How to create a portfolio
The portfolio is essential to get noticed.
Creating a portfolio is a good way of growing your online presence.
The portfolio is used to showcase your skills and projects.
It can help you to get a job, freelancer gig, or, internship.
Create my portfolio for free »What is a portfolio
The portfolio can have the same purpose as a CV. Most CVs are written with text, while the portfolio is for showcasing, so it is visual with images and often more detailed than the CV.
It is a place where you can show your work experience and showcase the projects that you are most proud of.
Your online portfolio can be shared with its link to companies, hiring managers, and recruiters, so that they can notice you.
It is about showing and giving others an understanding of who you are as a professional.
Why create a portfolio
It is a great way of growing your online presence and get noticed.
It can be used to get a job or to attract clients to your services.
Having it online as a website. Makes it possible for people all over the world to find you.
The design of the porfolio will give the reader an impression of who you are. Make sure that it appears in a good and presentable way!
Who is a portfolio for
Creating a portfolio can be important for your career.
It can be helpful when searching for a job, a freelancing gig, or showcasing your skills towards a new client.
Typical roles that use portfolios are professionals such as, but no limited to:
- Software developers
- UX designers
- Graphic designers
- Photographers
- Marketing professionals
- Architects
- Writers
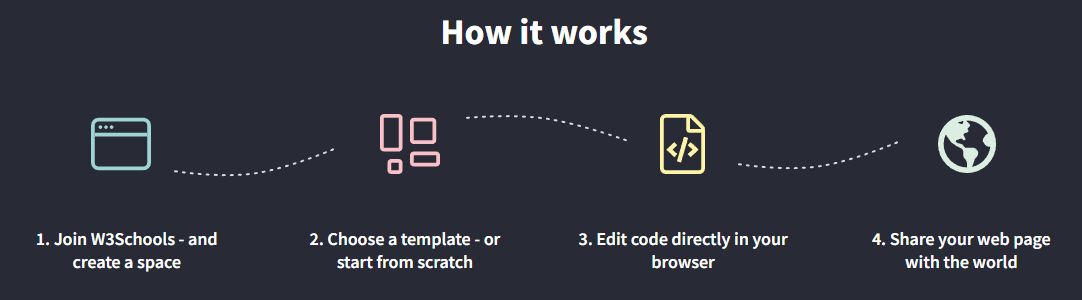
Ever heard about W3Schools Spaces? Here you can create your portfolio from scratch or use a template.
Get started for free ❯* no credit card required
What are the most important sections in a portfolio
There are many different ways of creating a portfolio.
How to create it depends on what type of professional you are, who you are building it for, and why you are creating it.
You have to test, fail and learn to find out which type of portfolio that is right for you!
There are some sections which is essential for all types of portfolios, summarized below:
1. Hero section.
The hero section is the first thing people see when they enter your portfolio.
It is displayed under your logo and menu.
The hero section helps the reader to understand what you offer, why someone should work with you, and the value that you provide with your services.
It often contains a call to action button like "contact me", "book a meeting" or similar.
2. About me section.
Give the reader a short summary about yourself.
Include subjects such as your education, work experience, projects and interests.
Help the reader to understand what you are passionate about and your superpowers (the things that you are really good at).
Remember to keep it short and simple.
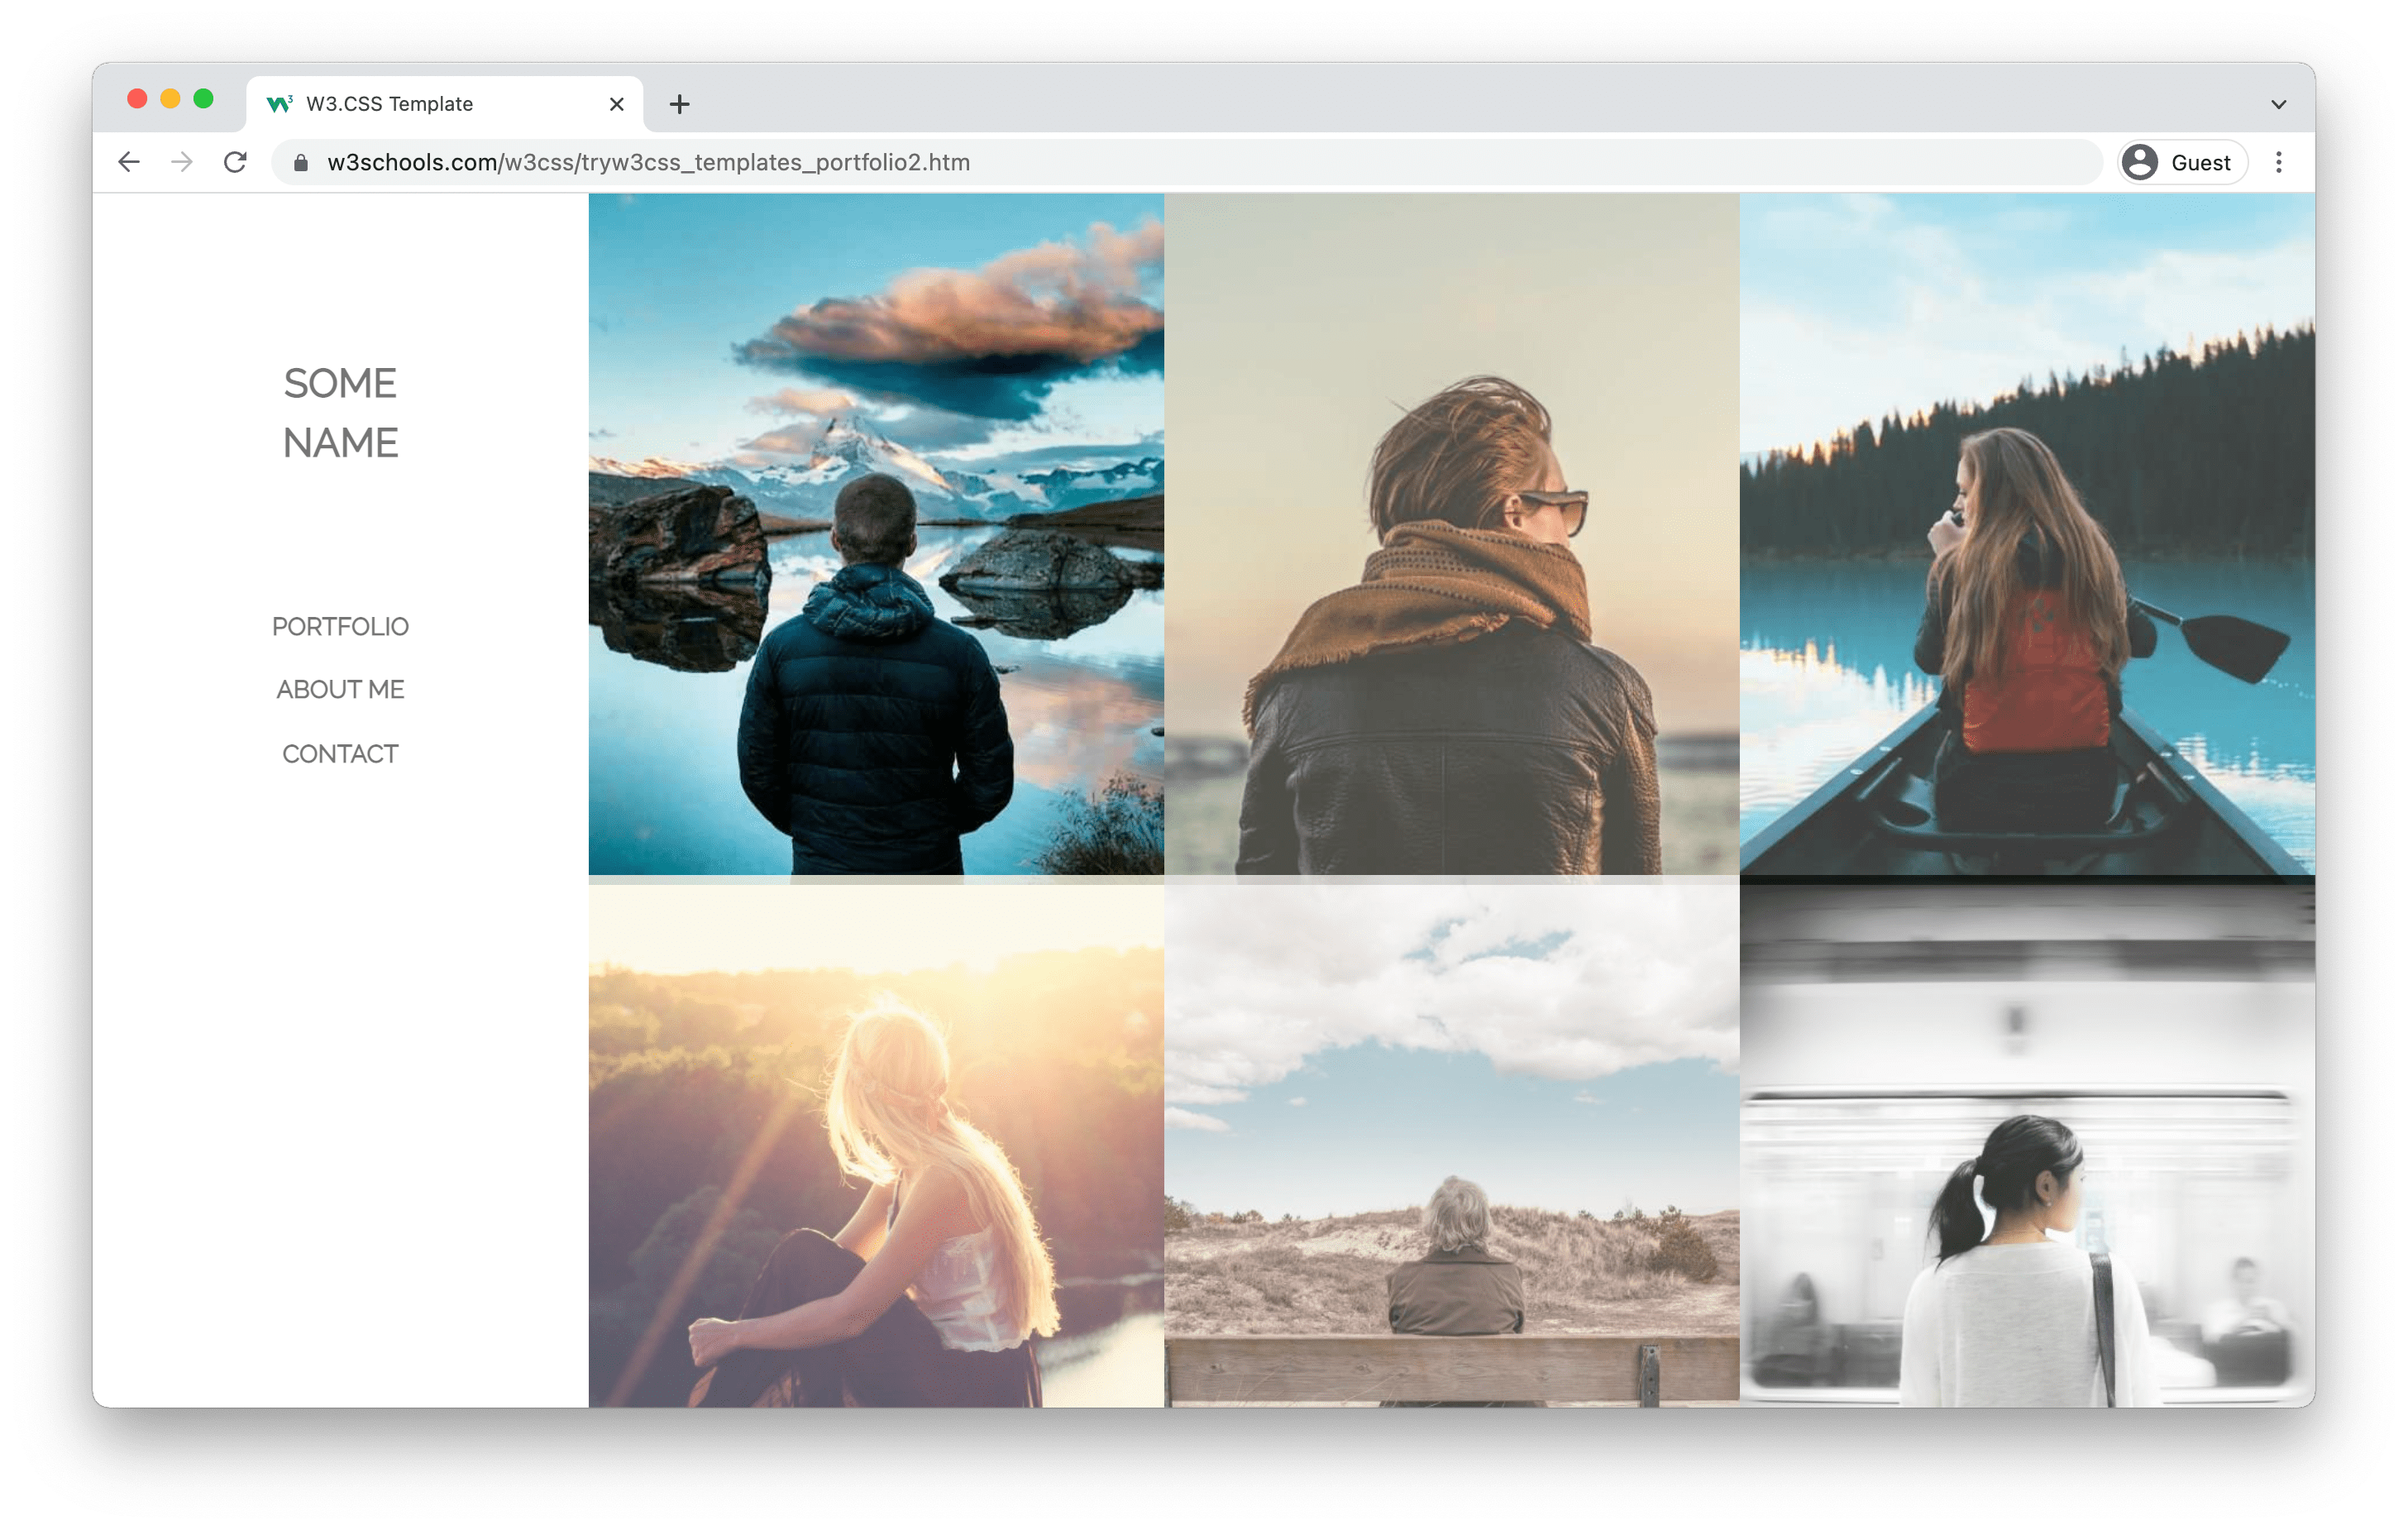
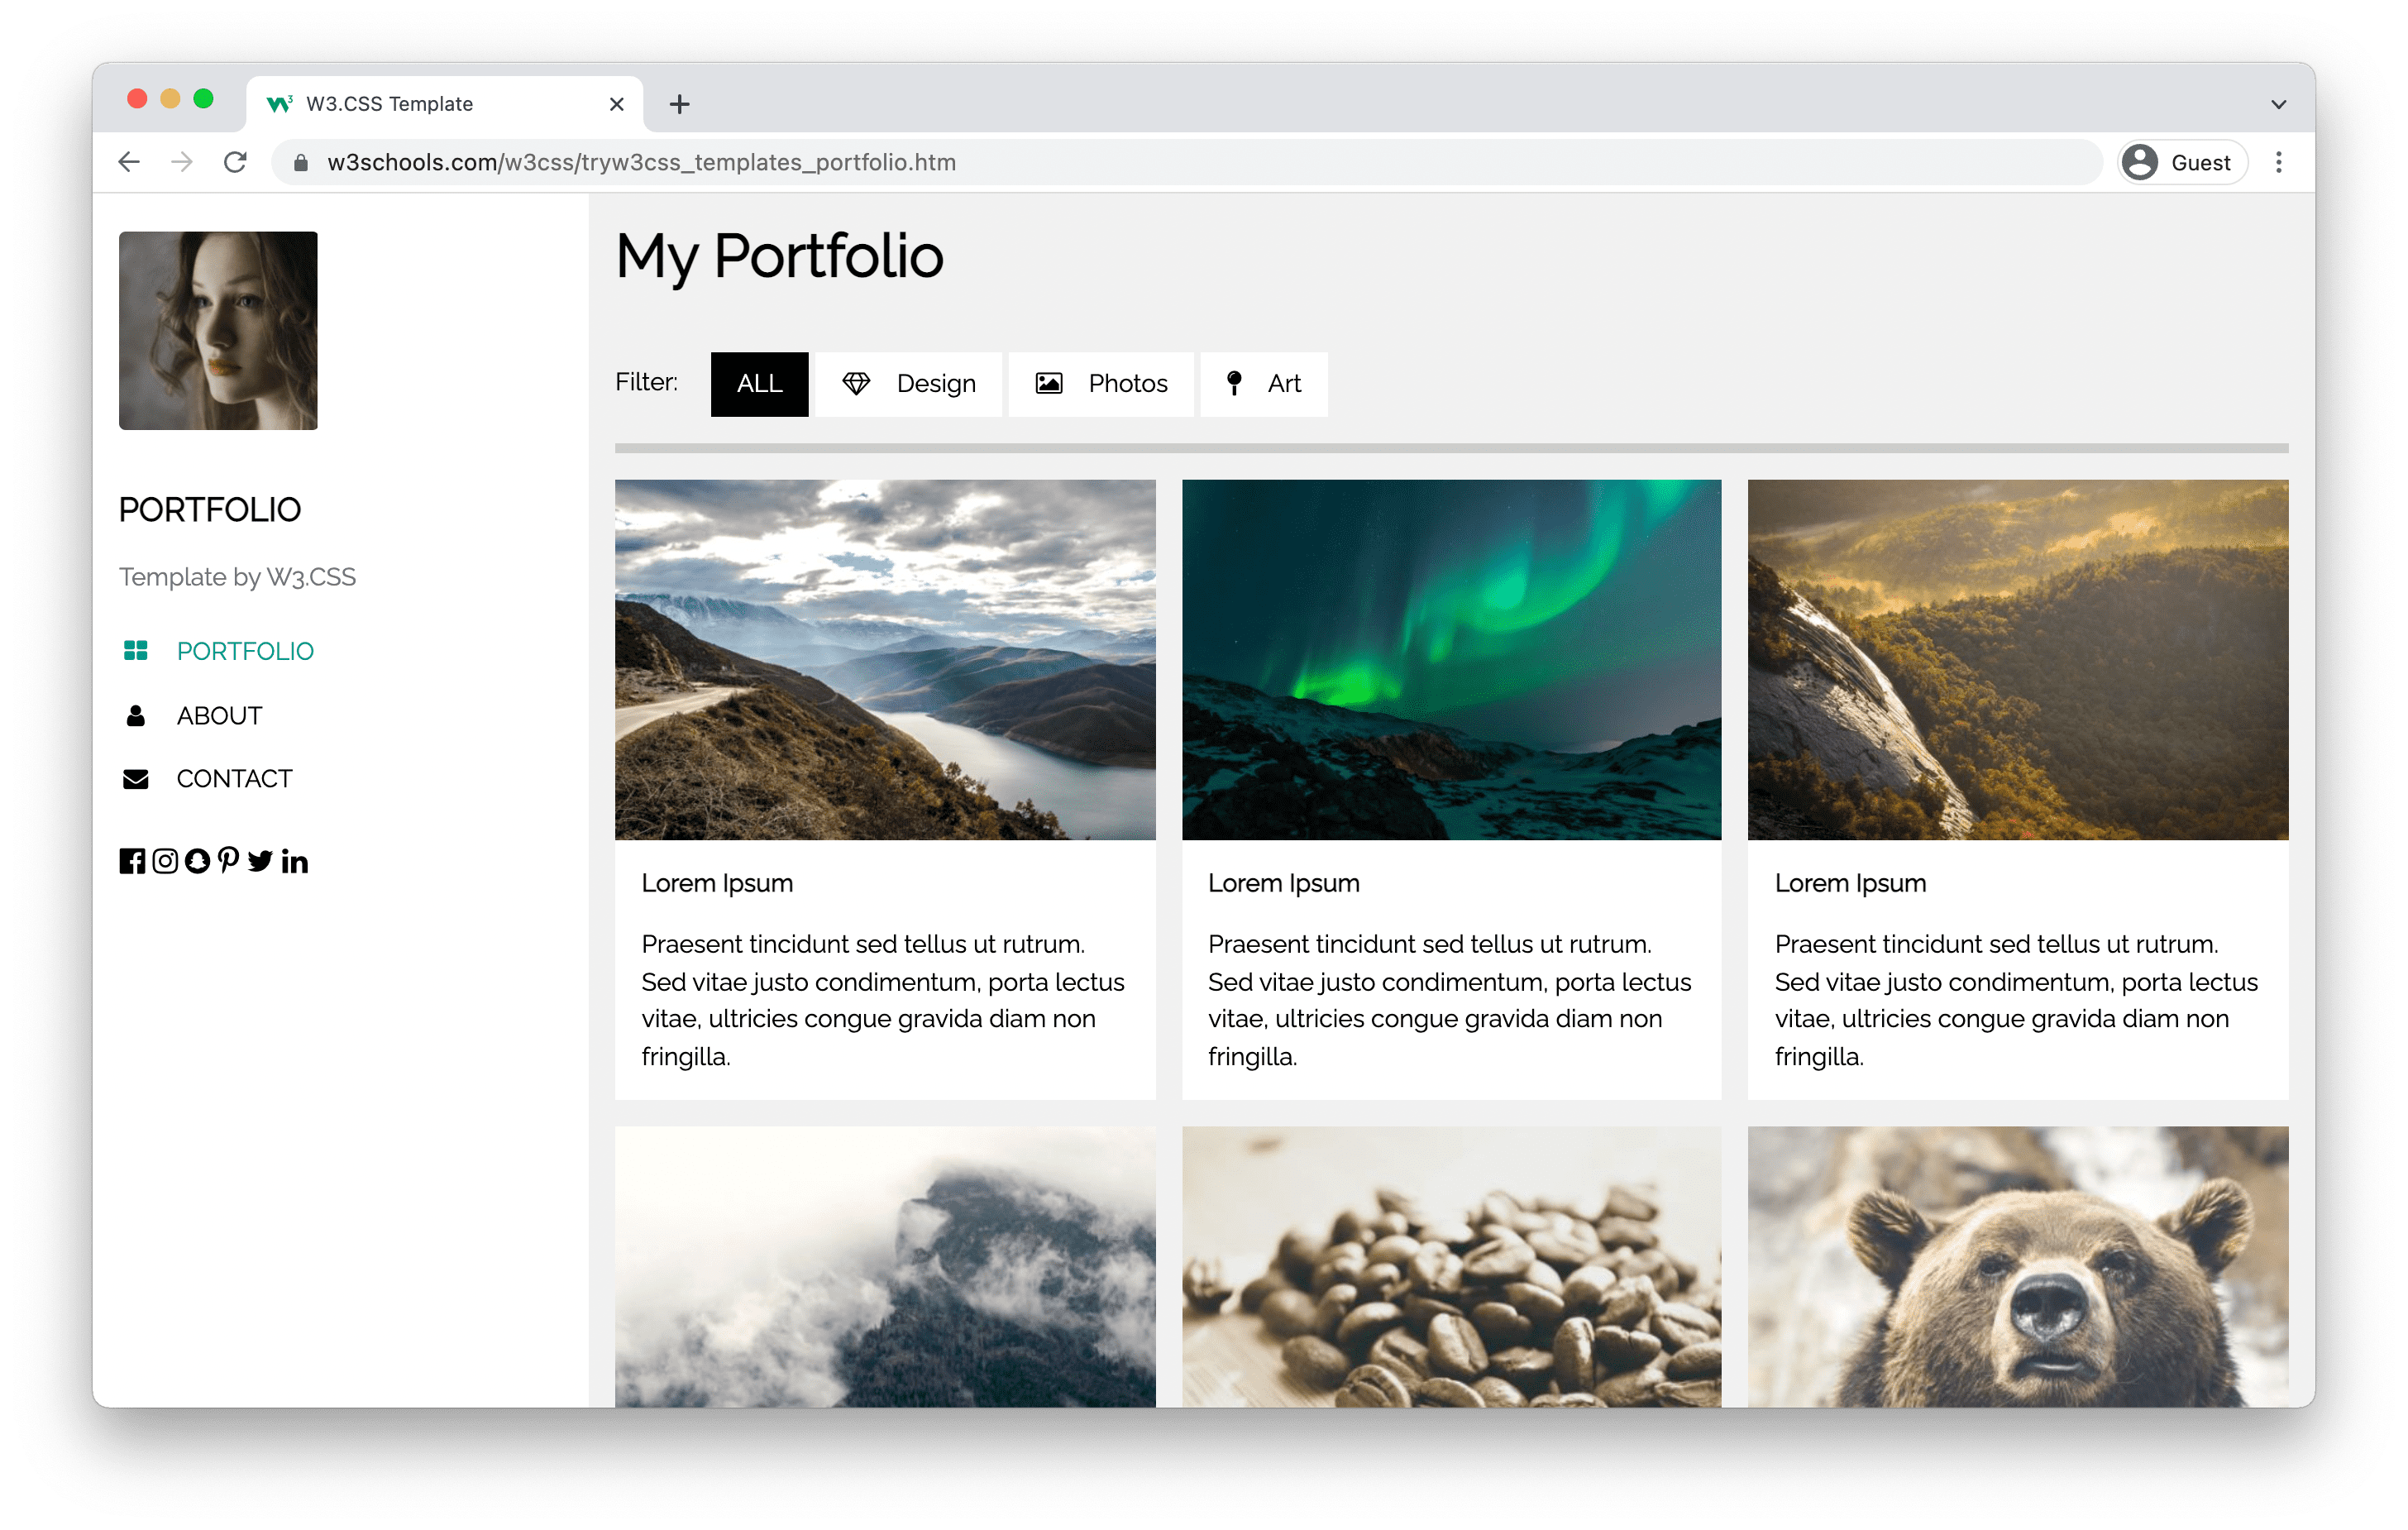
3. Projects section.
List the projects that you have worked on. The most used way is to order the list by date, but in some cases it can make sense to order them in another logical way.
Add details to each project, which includes your role, what you did, and, how the project turned out.
Adding pictures to showcase what you built is a plus! Showcase the things that you are proud of.
4. Contact me section.
Let the reader know how and where they can get in touch with you.
Add your contact details and other contact channels such as your GitHub profile, LinkedIn, Youtube and so on.
Portfolio examples
Check out some portfolio examples.
You can load the portfolio templates in W3Schools Spaces. Get started with publishing your portfolio in a few clicks.
Publish my portfolio ❯* no credit card required
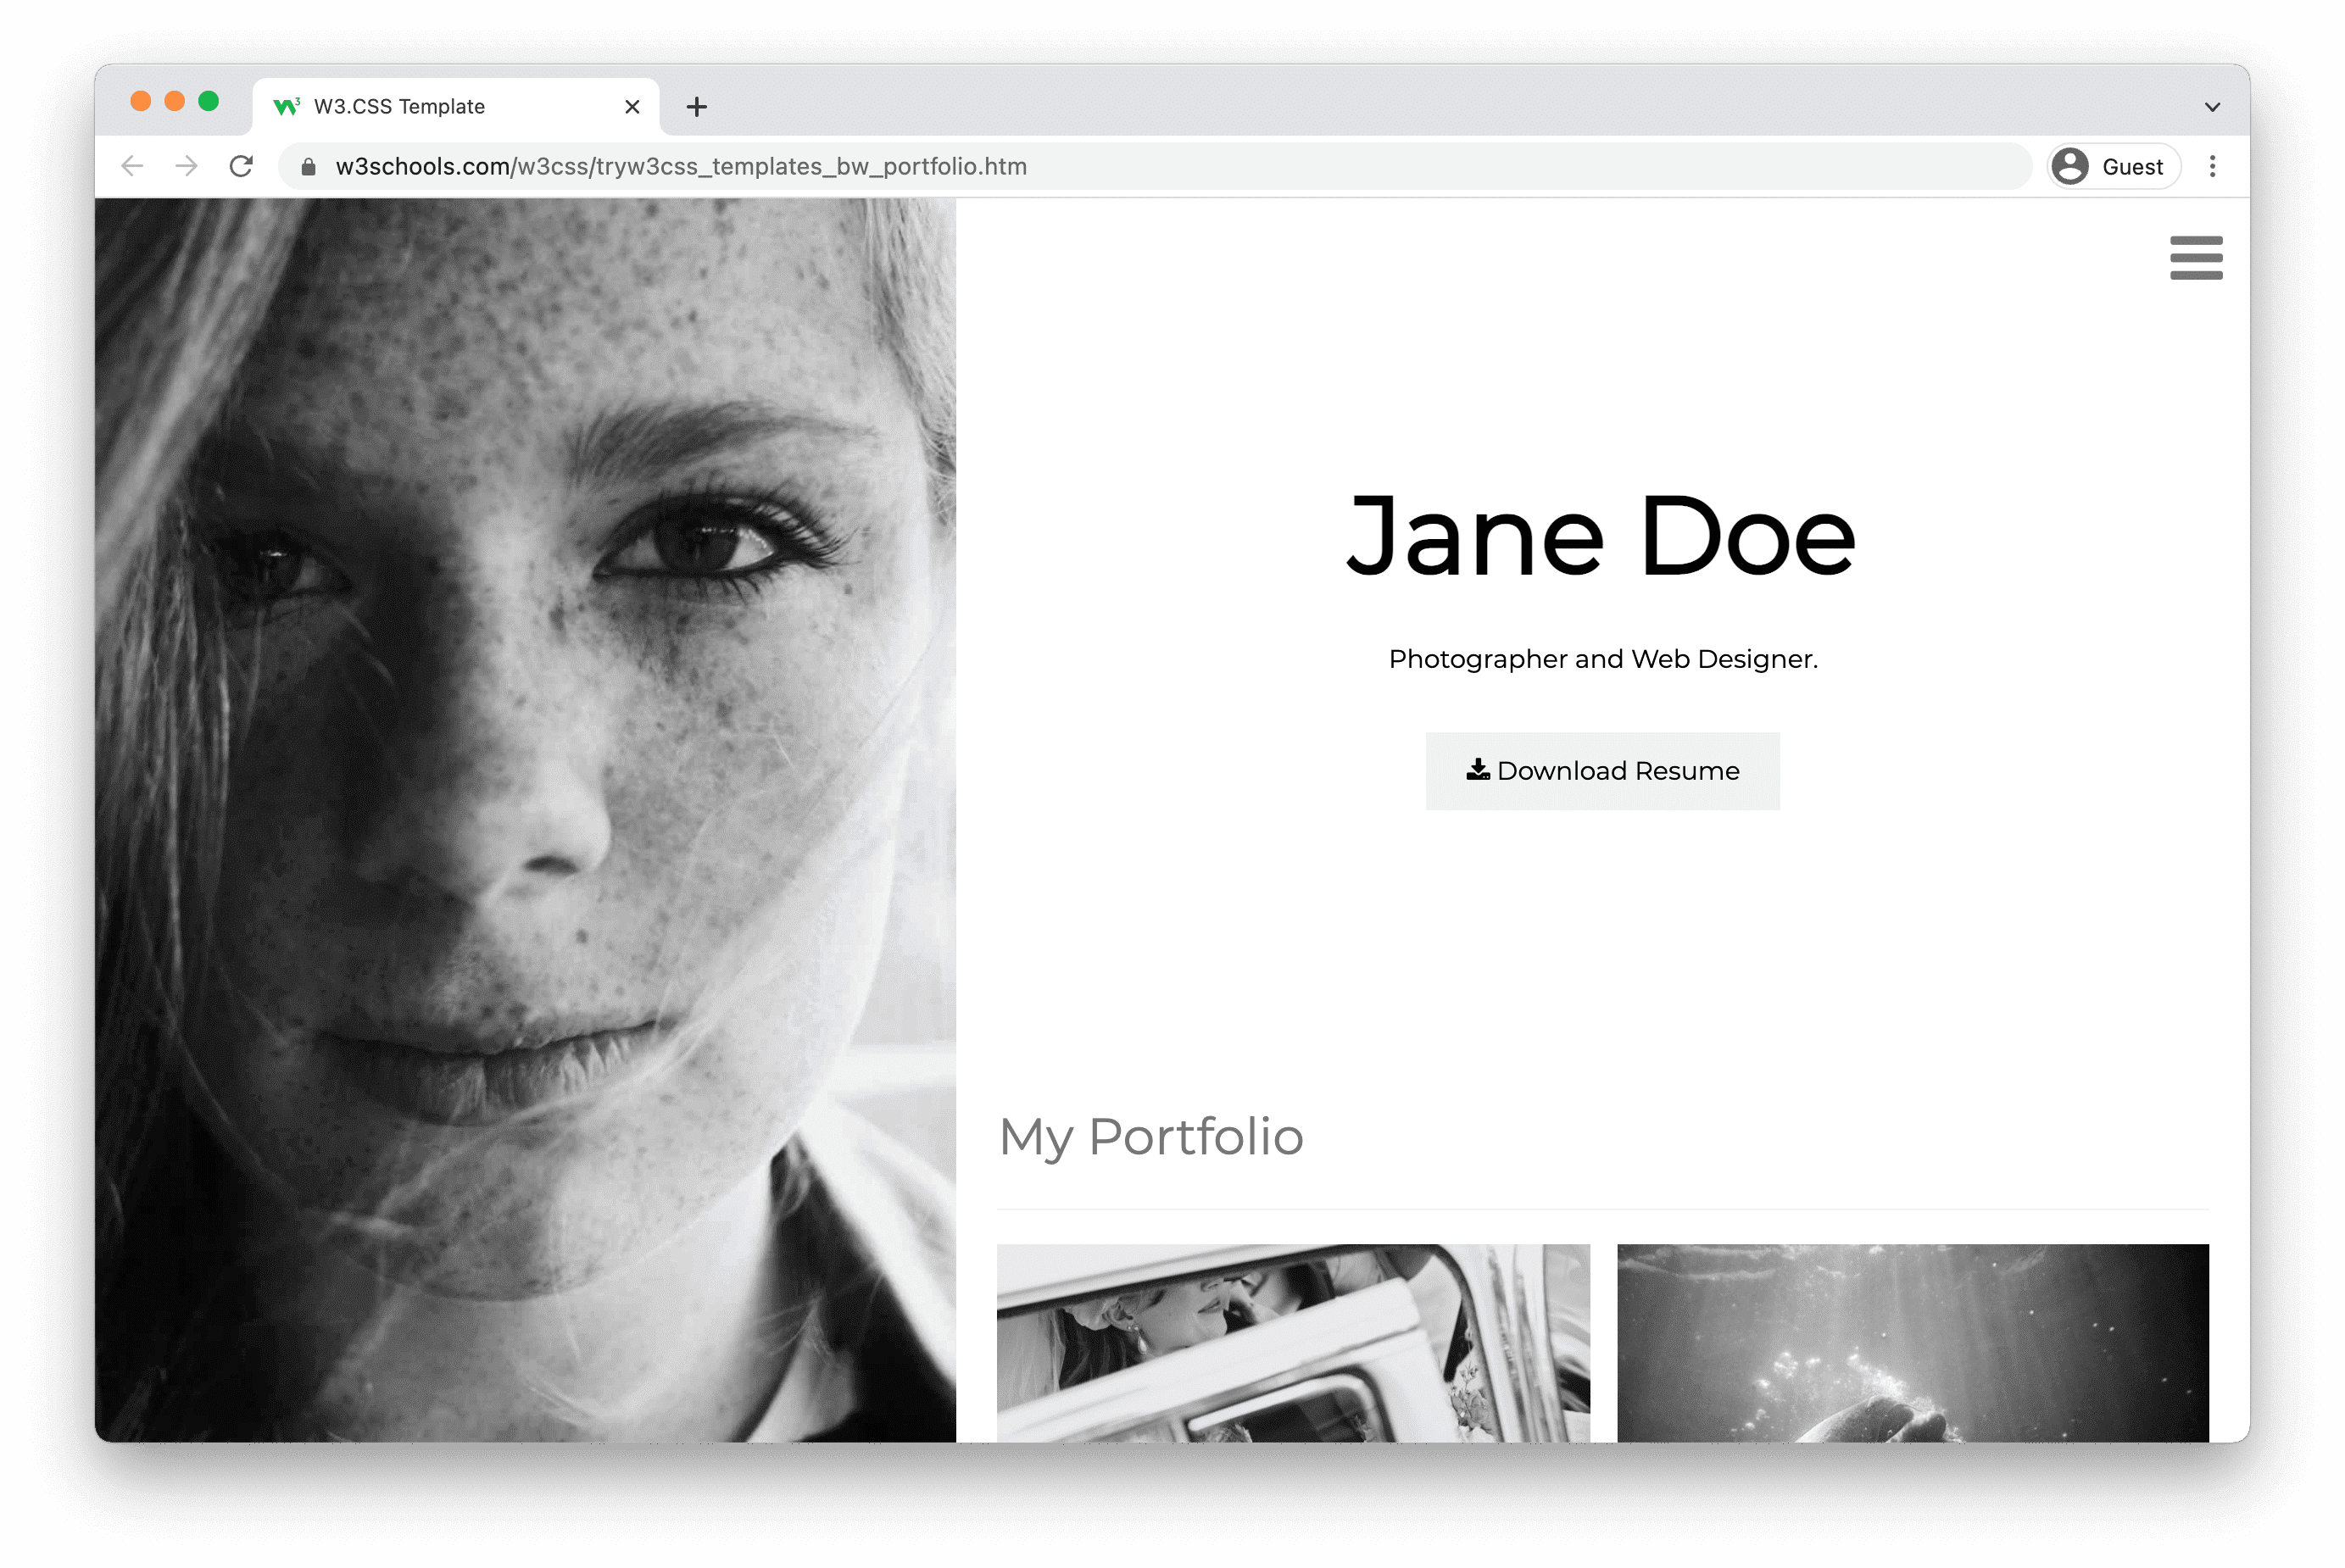
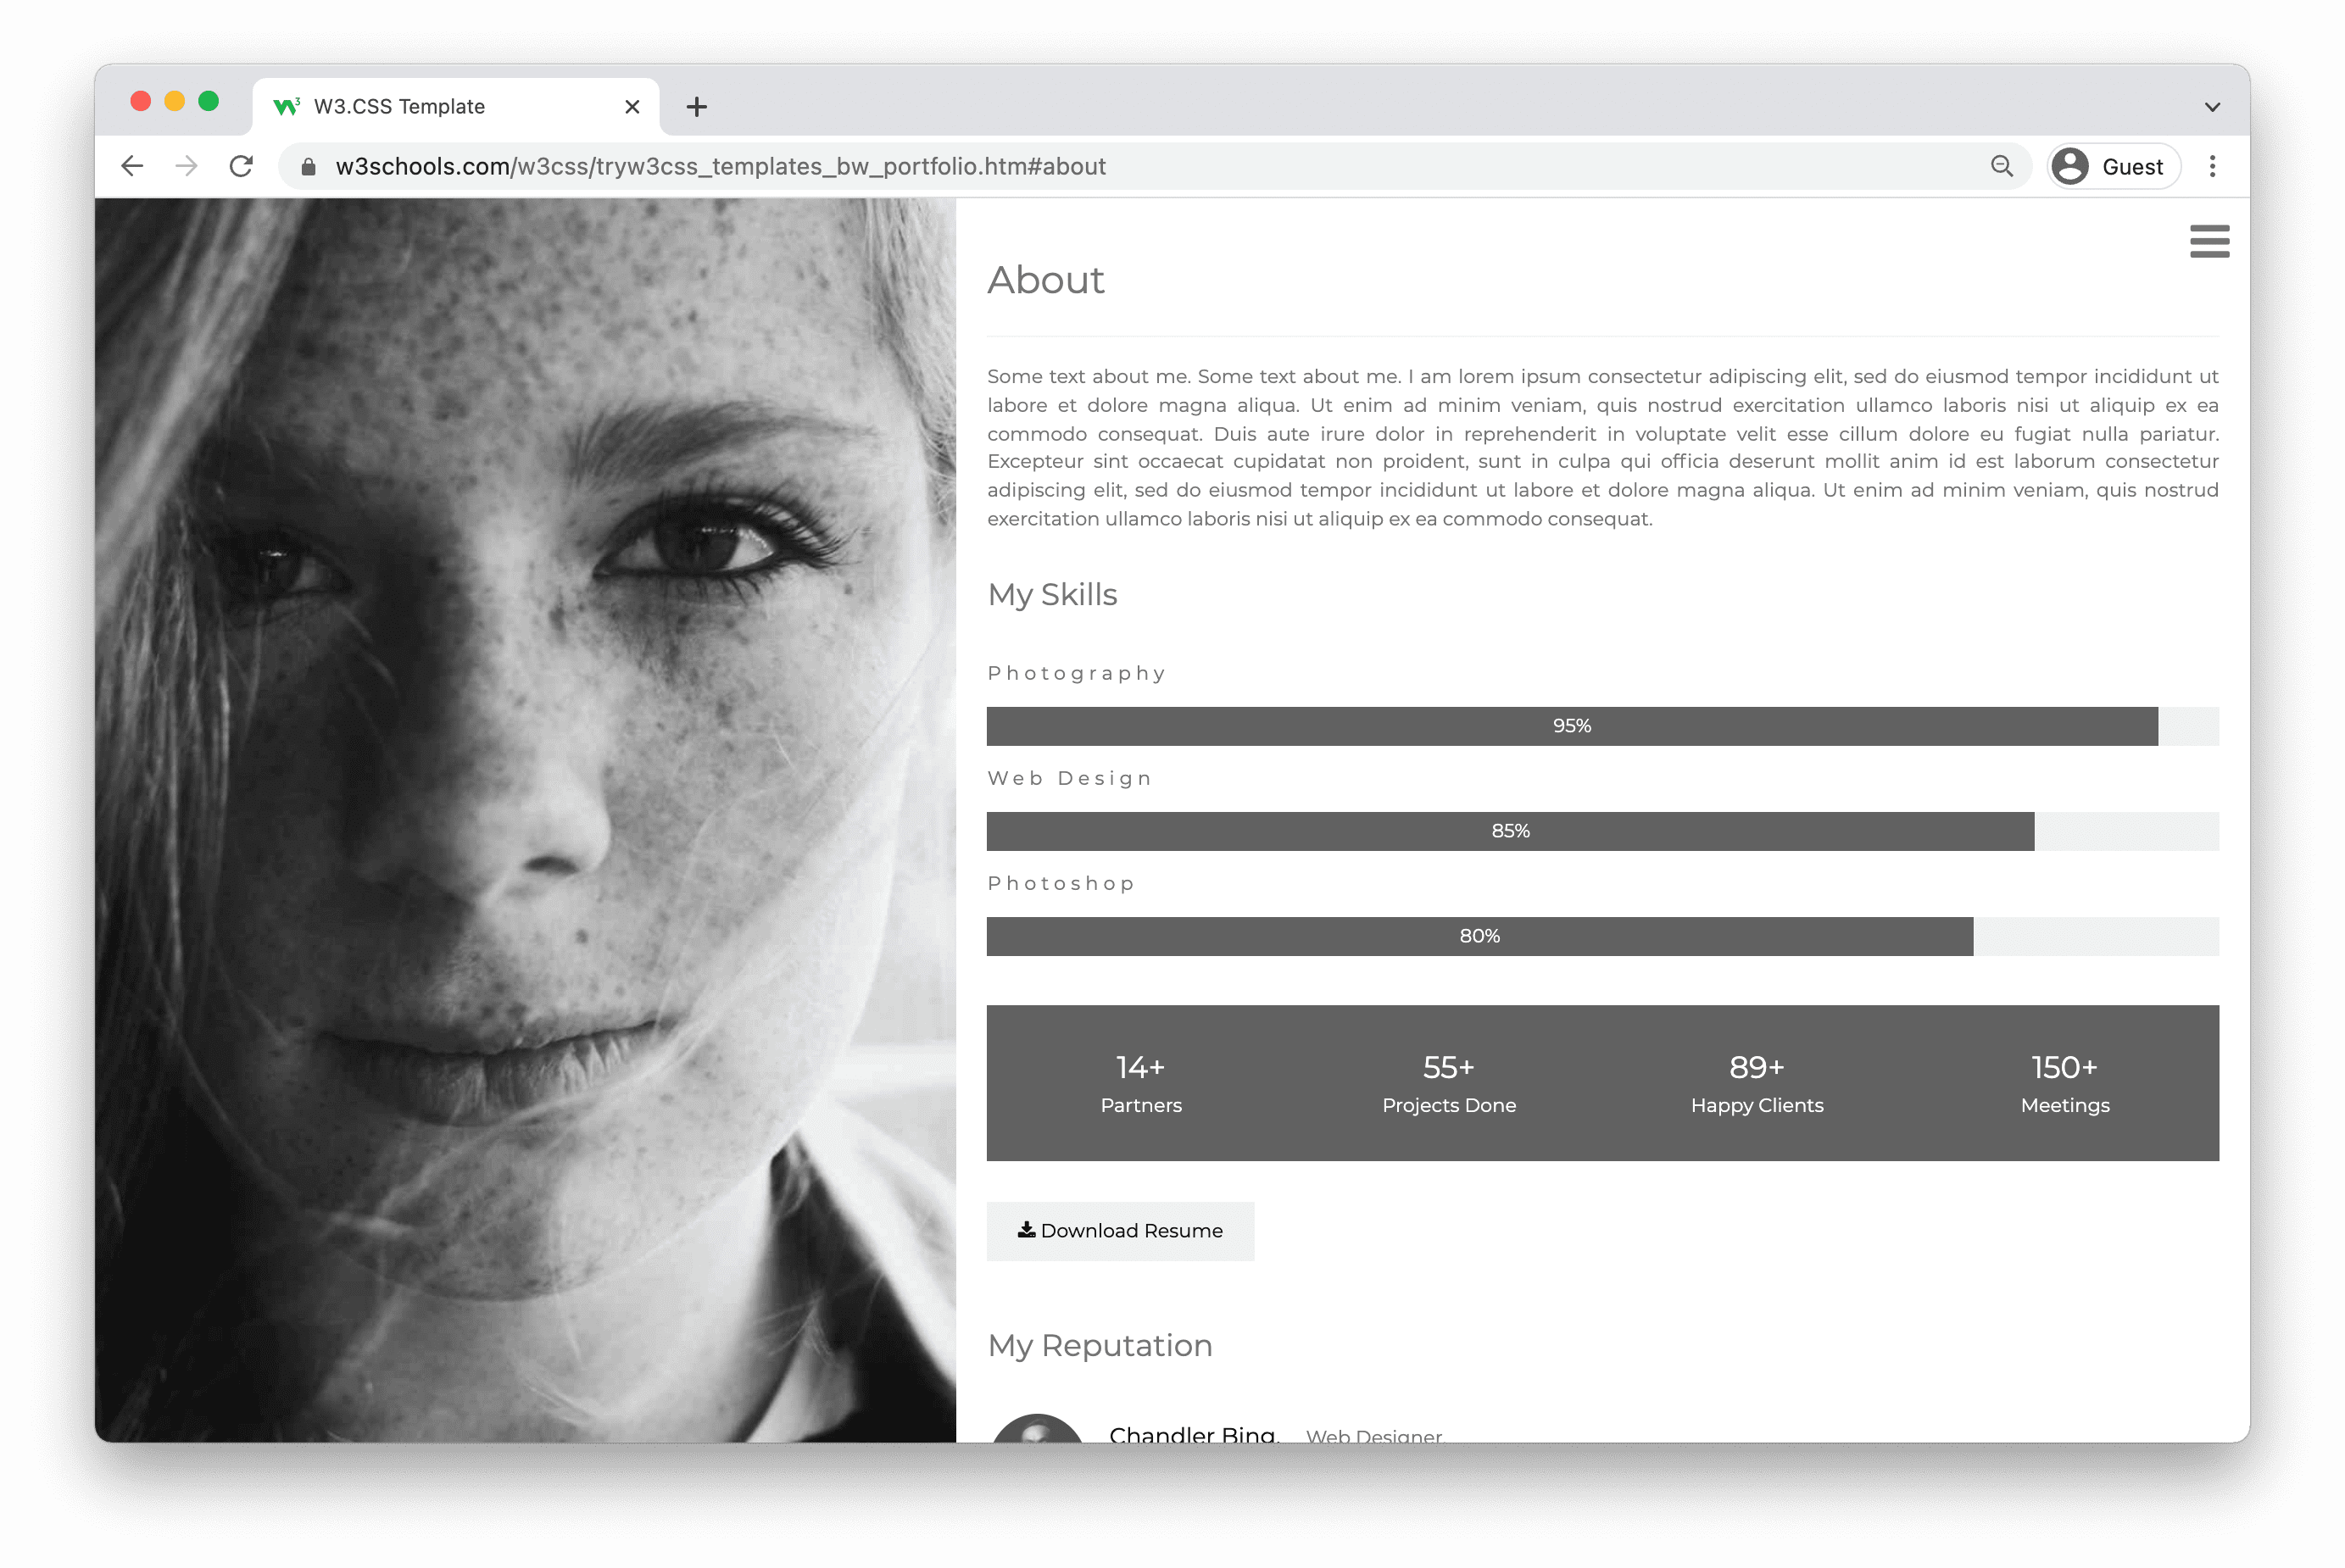
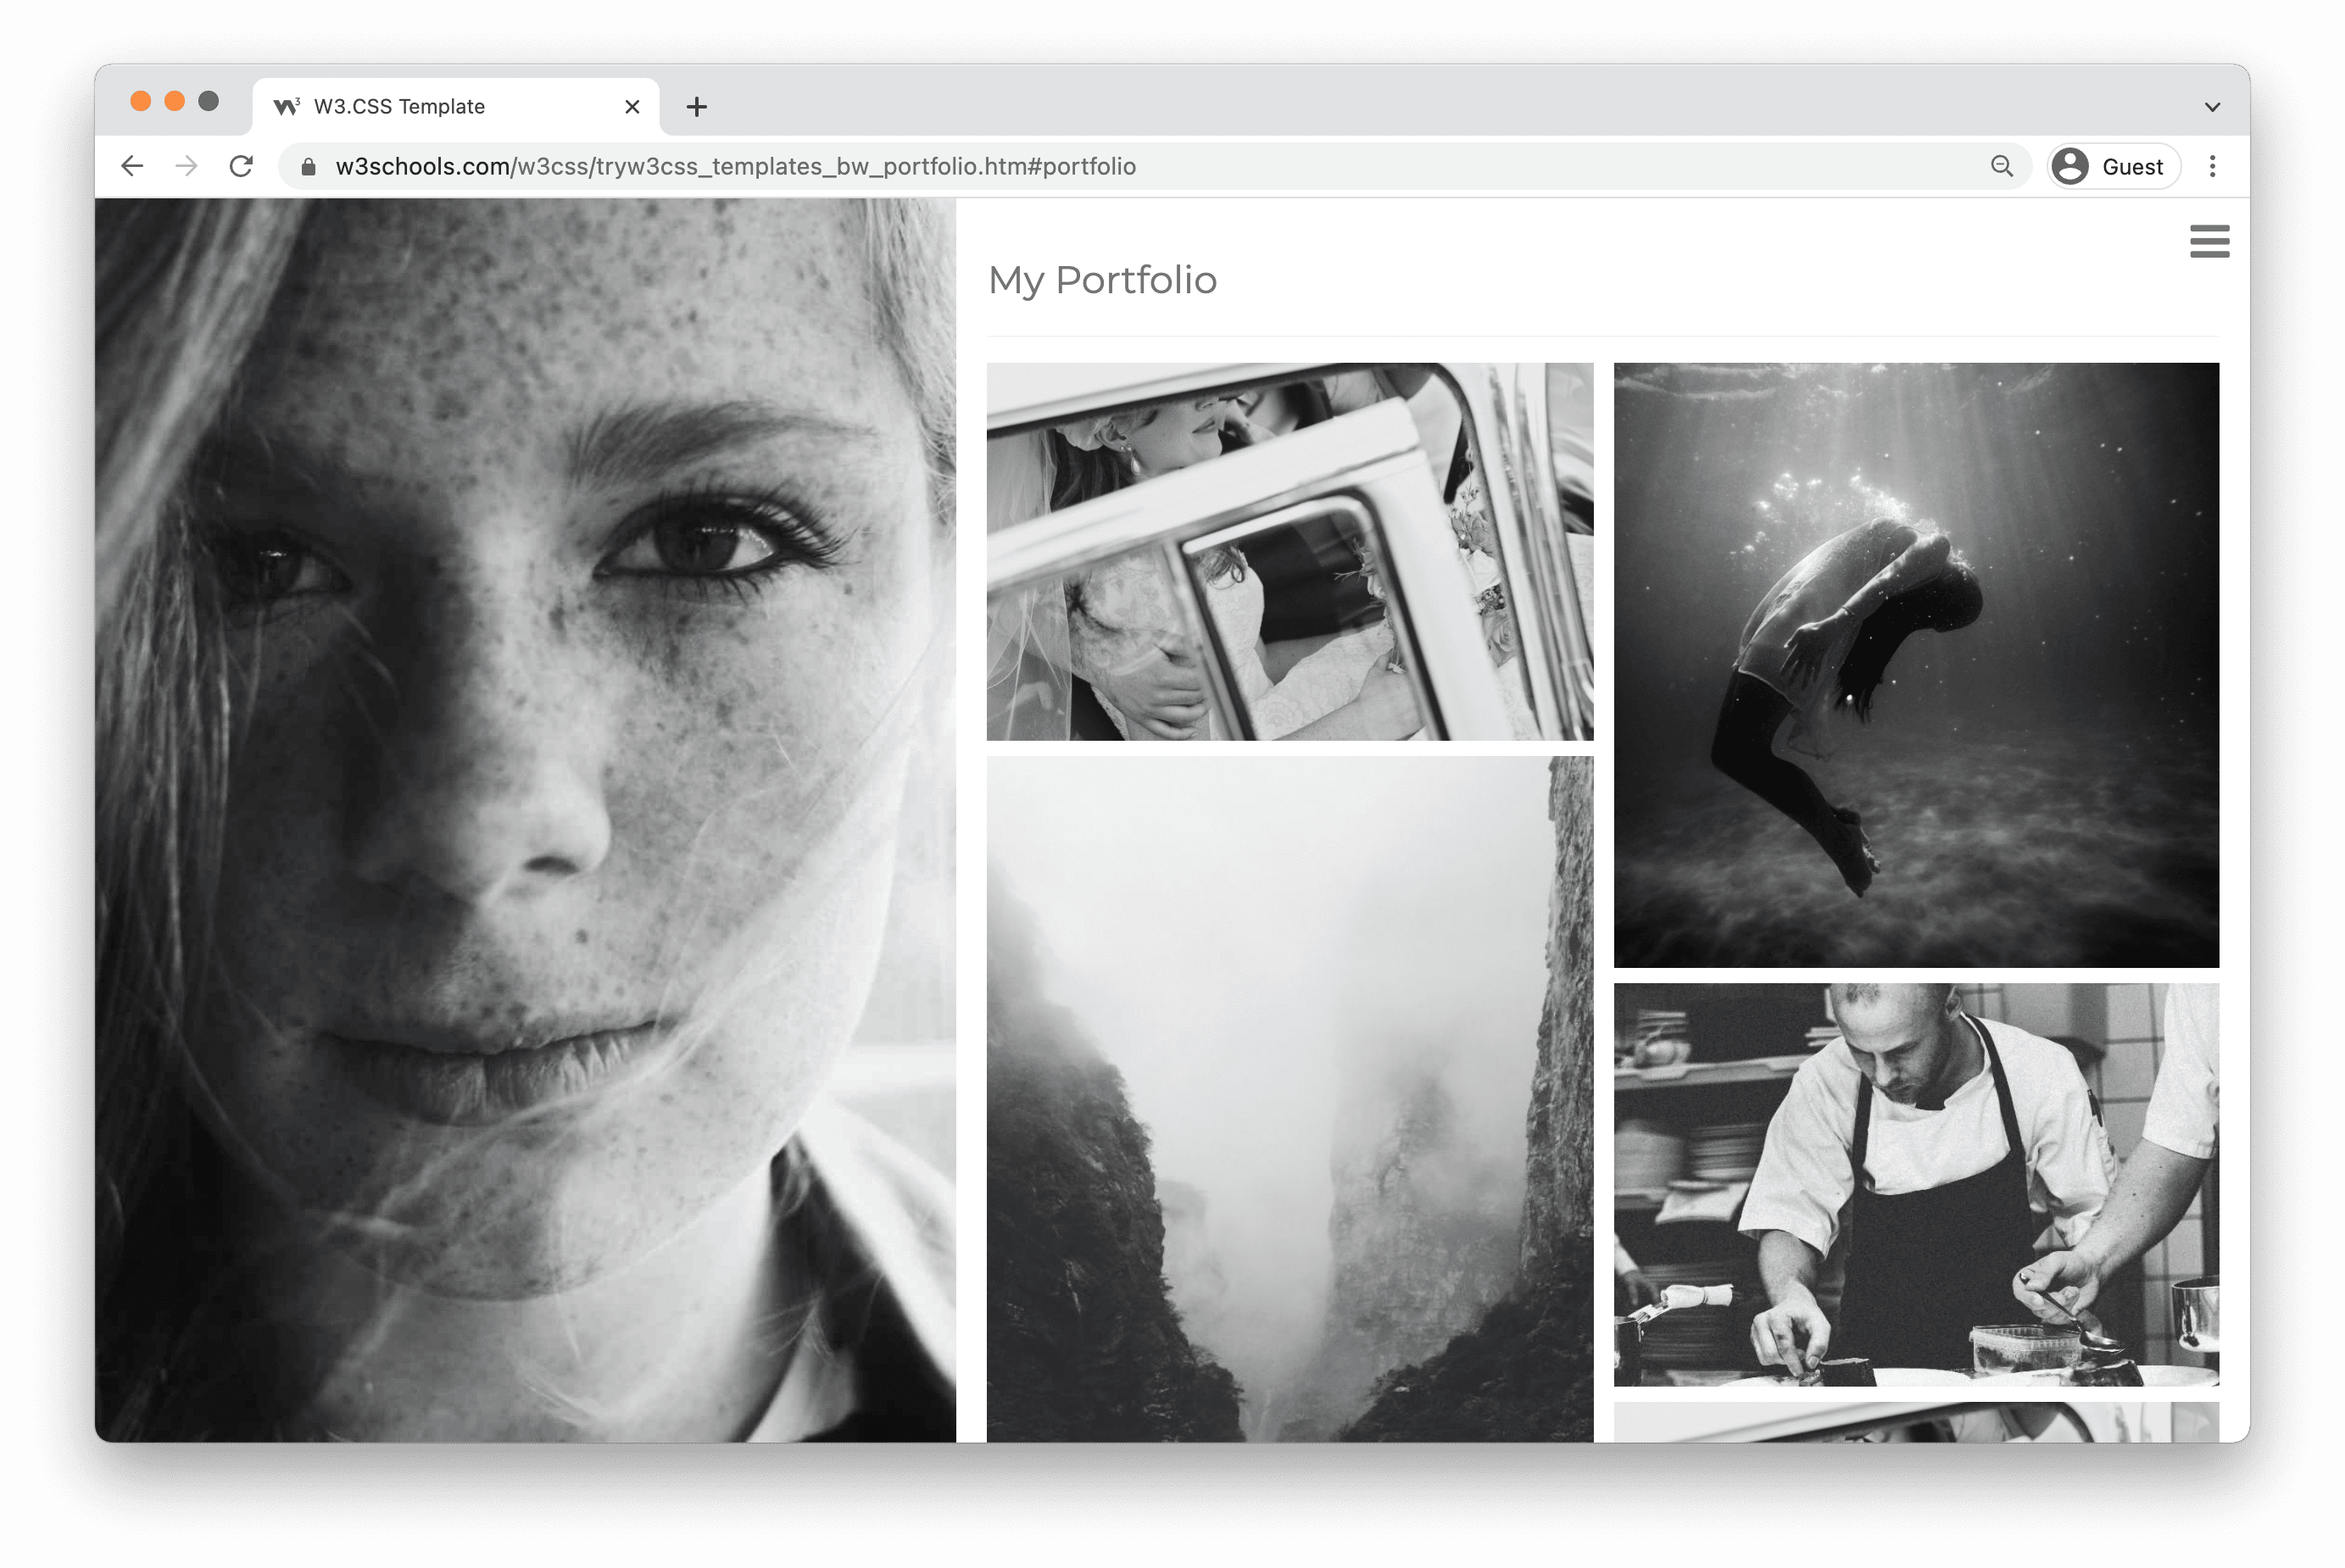
Black & White Portfolio Template
Dark Portfolio Template

People Portfolio
My Portfolio Template
What do I need to know to create my own portfolio?
HTML, CSS and JavaScript are the foundational languages to create a website.
You can come a long way just using these three!
- Create the structure with HTML. The first thing you have to learn, is HTML, which is the standard markup language for creating web pages. Learn HTML ❯
- Style with CSS. The next step is to learn CSS, to set the layout of your web page with beautiful colors, fonts, and much more. Learn CSS ❯
- Make it interactive with JavaScript. After studying HTML and CSS, you should learn JavaScript to create dynamic and interactive web pages for your users. Learn JavaScript ❯
How to create a portfolio step-by-step
Follow the steps to create your portfolio from the ground up.
Preparations
Decide which code editor to use and set up your environment.
W3Schools has created an easy to use code editor called W3Schools Spaces. Sign up and get started in a few clicks.
Start for free ❯Create your index.html file. So that you are ready to enter the code.
All set up. Lets go!
Step One: Add HTML Skeleton
Type an HTML skeleton code, which is the starting point for your website. It is the structure which holds the code and ensures that it is properly displayed on the internet.
Read here for how to create a basic HTML Skeleton: How to create a HTML Skeleton
Step Two: Add Navigation Bar
The navigation bar is a short representation of the content on the website.
It is one of the first things that a visitor will see.
It helps the visitors to find and navigate through the content on website. It is important to create well-structured navigation. So that your visitors can find what they are looking for.
Here is an example of how to create a top navigation bar: How to create a Top Navigation Bar
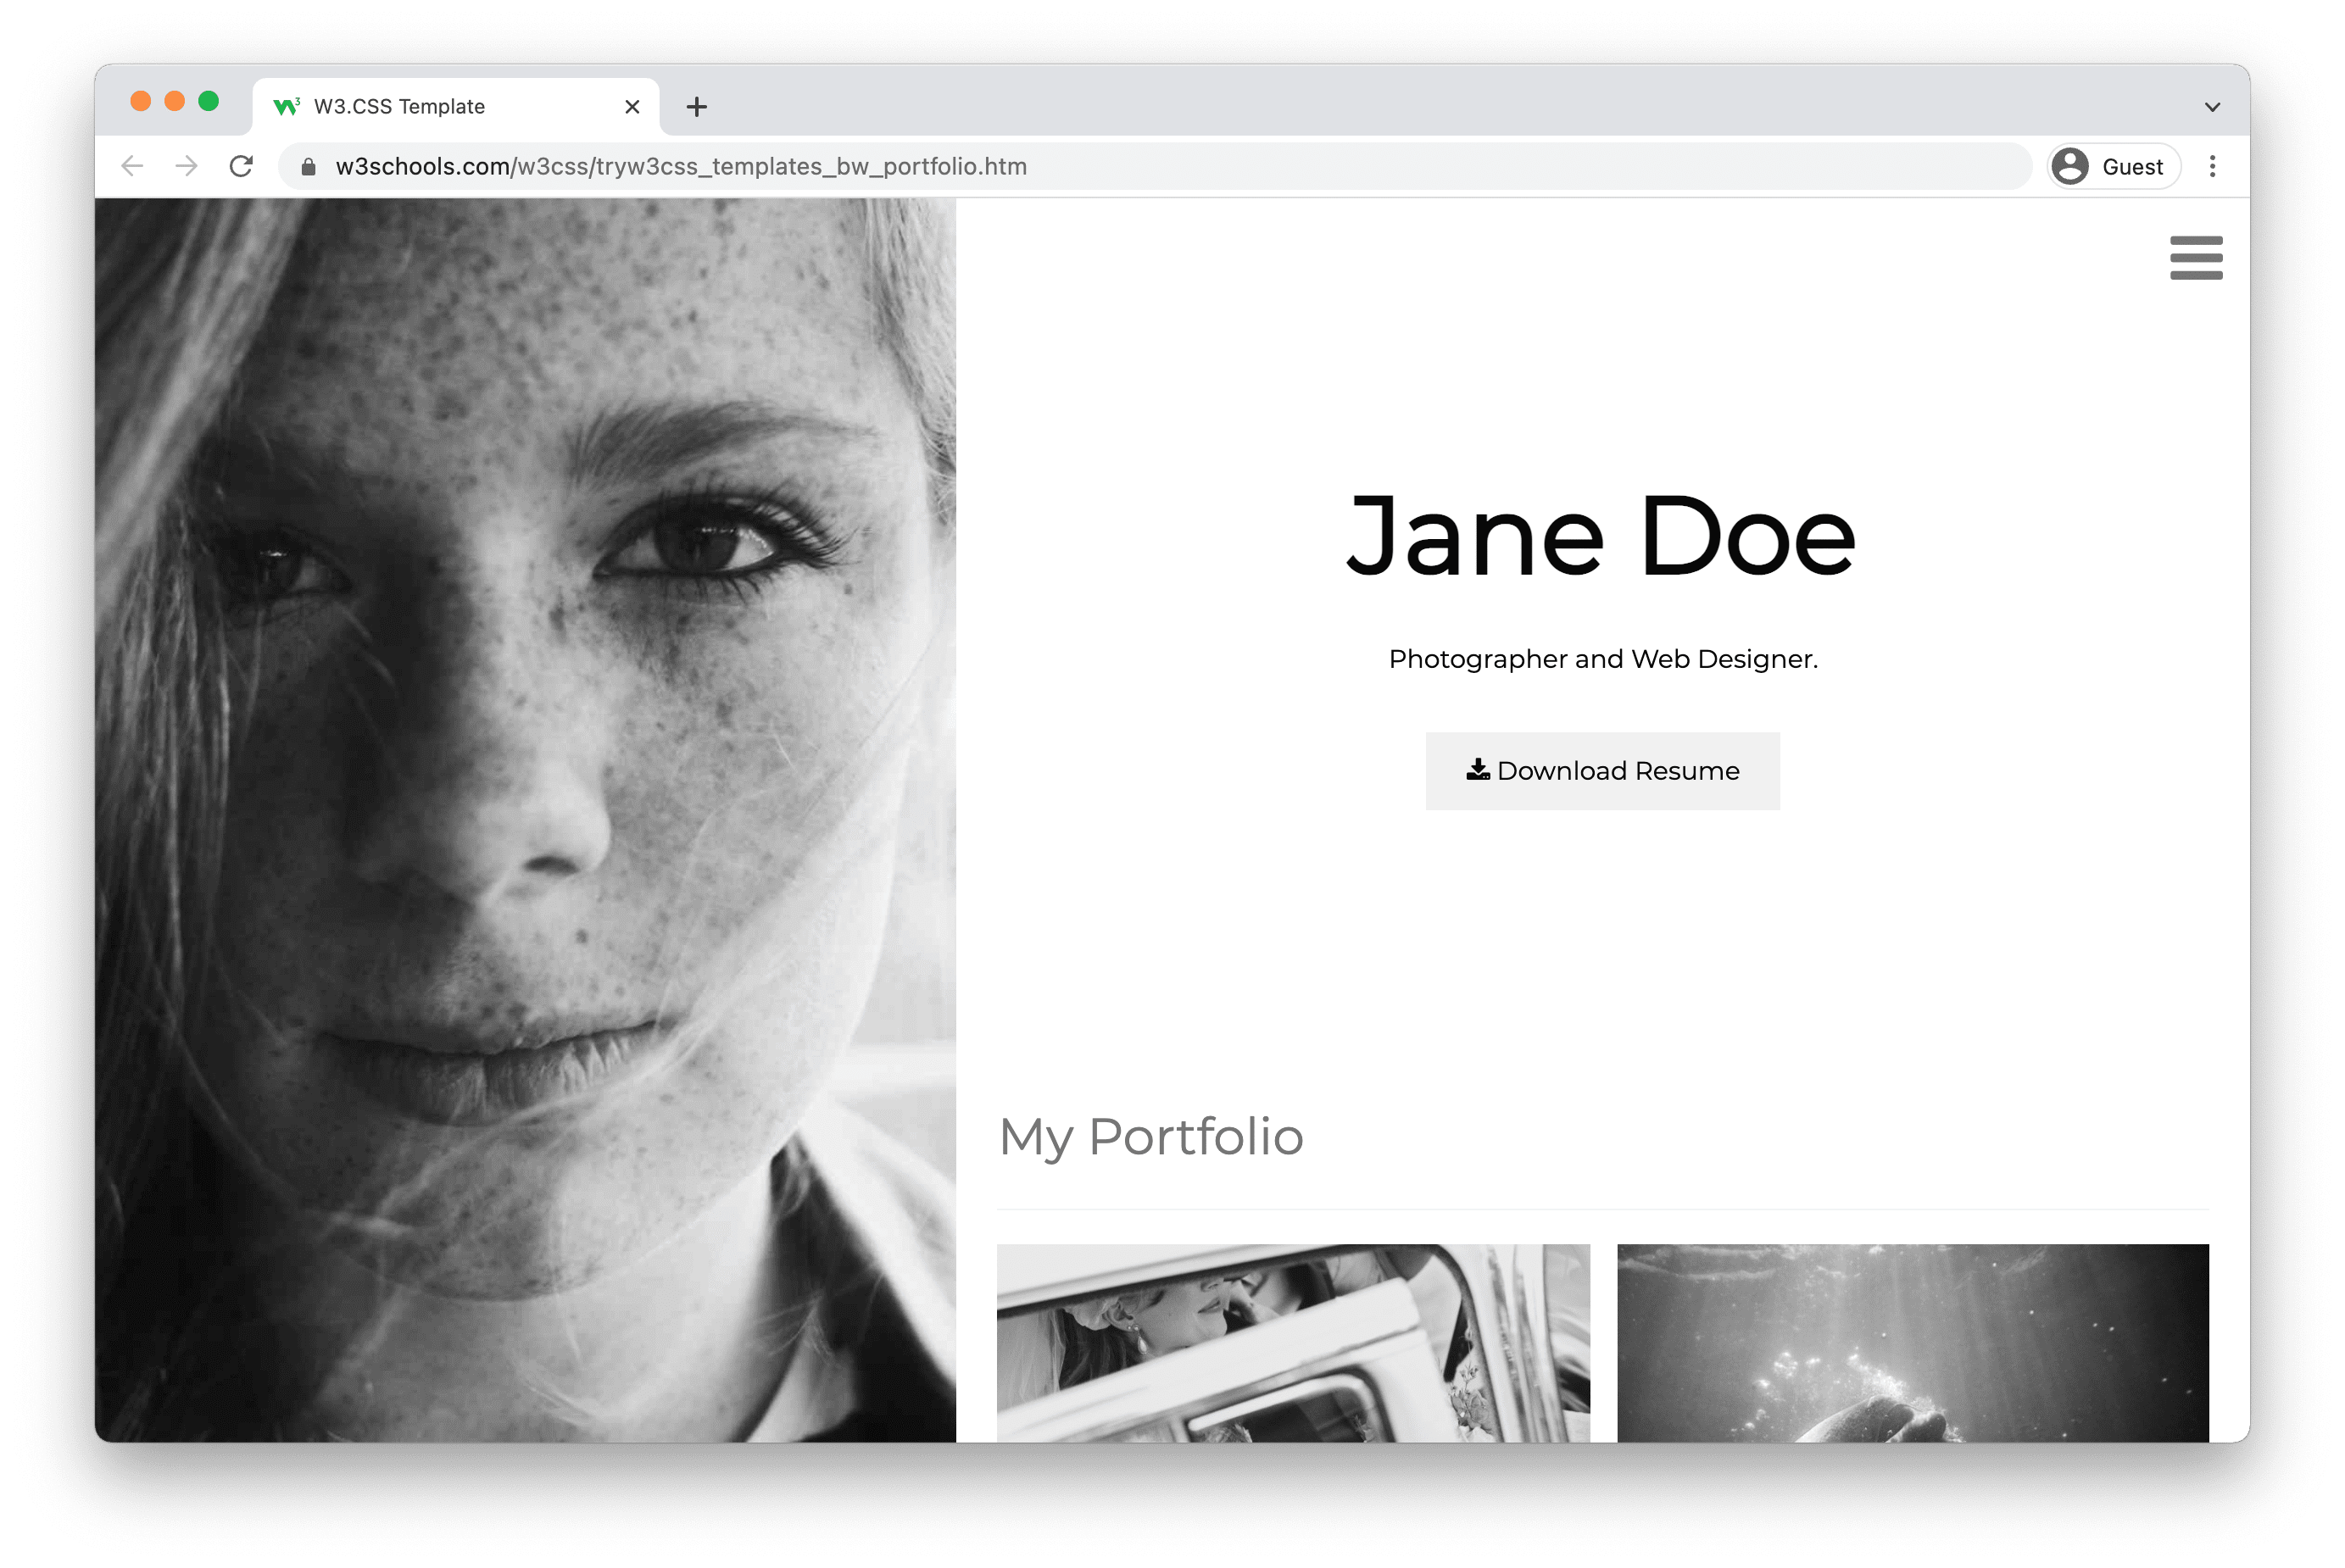
Step Three: Add Hero section
The Hero section, together with the navigation bar, is the first section of your portfolio that people will see.
It should contain short information about several things such as:
- Who are you?
- What do you offer?
- What is your profession?
- Why should people work with you?
- Which actions should you take?
Write in first-person and keep it short and simple.
Additional things preferred in the hero section are:
- Eye-catching graphics, either as a background or side-by-side with the text.
- An action button that leads to content on your portfolio or to the content of another website.
Here is an example on how to create a Hero section: How to create a Hero image
Step Four: Add About Me section
In this section, you can get creative. This can help you to to stand out.
Here you can personalize the content and write about yourself more in-depth.
The content you can include in this section is:
- Your introduction
- Who are you as a professional
- Your education
- Your skills
- Your work experience (present and/or past)
- Your hobbies
- Your goals and ambitions
In a way, you can consider the "About me" section as a short summary of your CV.
Feel free to write about yourself in first person.
Personalization and making people understand you as a person might bring you more attention.
Here is an example on how to create an about me section: How to create an About Me section
Step Five: Add Work Experience section
The work experience section highlights the experience, knowledge, and competence that you have made along your way.
Here you can add:
- Links to your projects with the project name and/or short description of what the project is about.
- Links to blog posts that you have written with title and/or short description about what it is about.
- Your professional awards or achievements.
- Highlighting your work and your accomplishments is a way to create opportunities for yourself.
- Visual representations such as images or graphics.
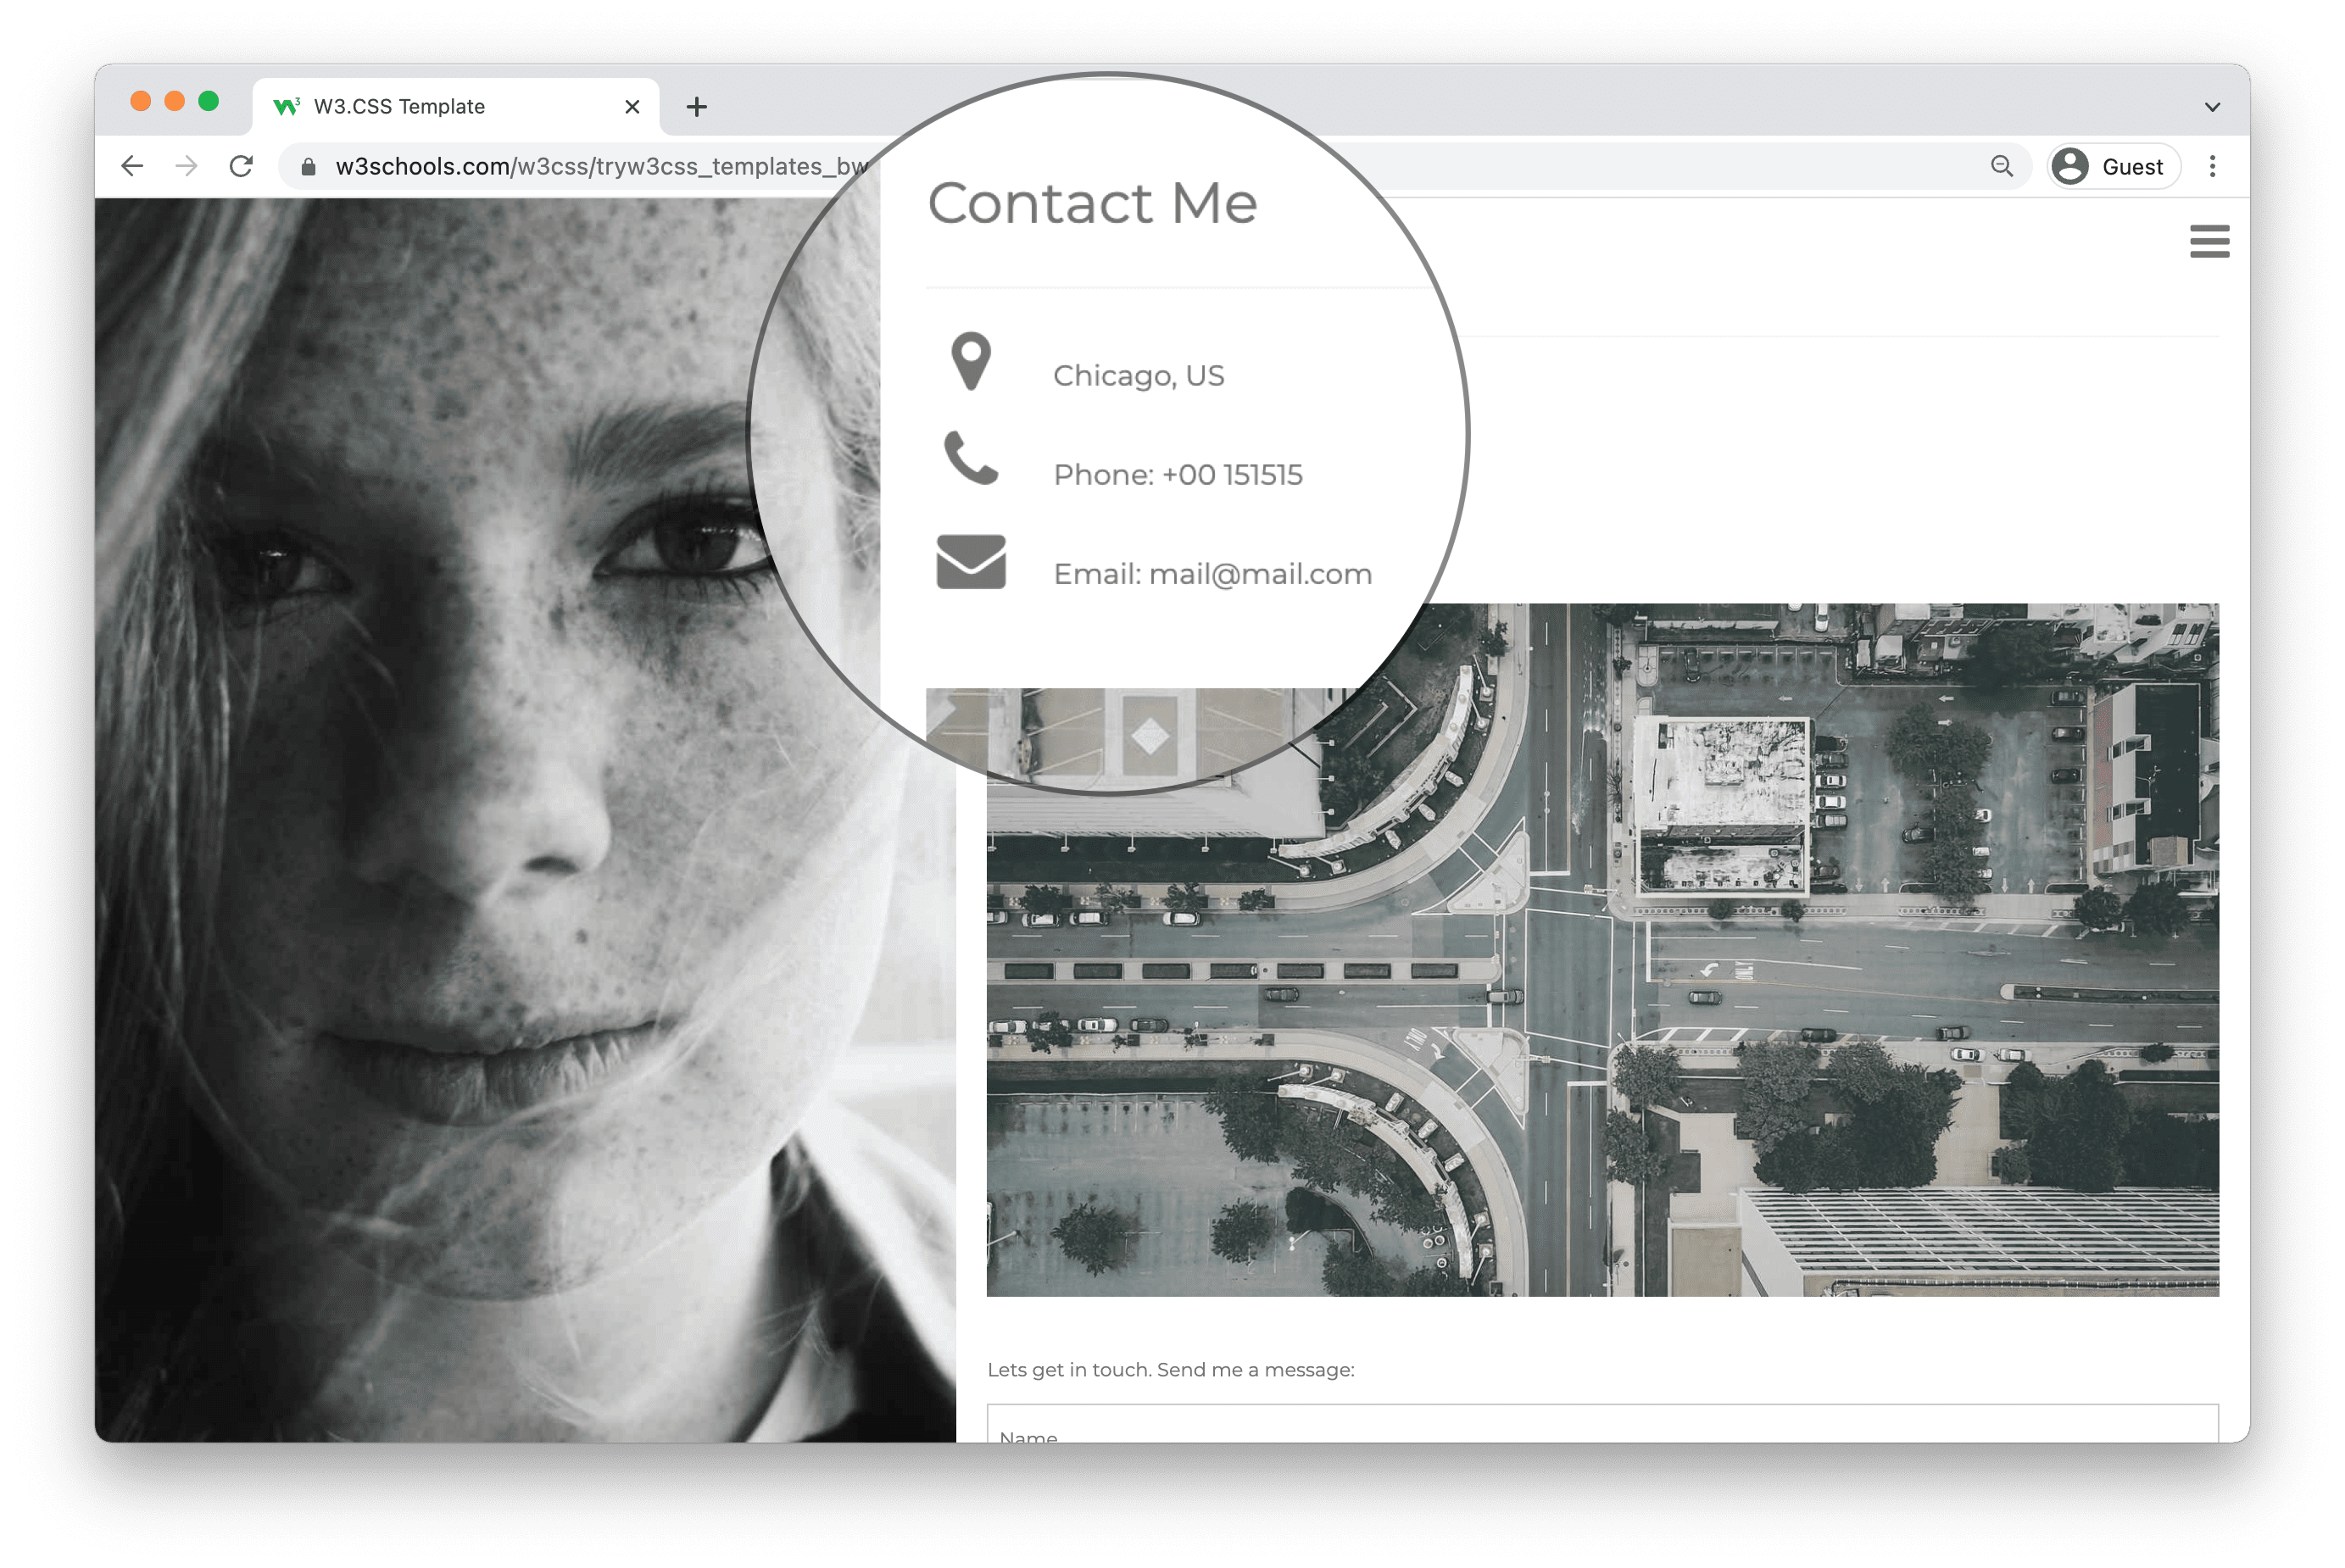
Step Six: Add Contact section
The contact section is the section that lets your visitor get in touch with you.
You should always include a way for visitors to contact you, either through a contact form or by writing down your contact information such as:
- Address
- Phone number
- E.g. Github profile, LinkedIn profile, Youtube profile and so on.
Here is an example on how to create a basic contact section: How to create a Contact section
Step Seven: Add Footer section
The footer can be experienced as a minor section, but it is an important one of every website.
It is about showing critical information based on your website goals and the needs of your visitors.
Often it contains technical information about copyright, but it can hold other information, such as:
- Link to "Privacy policy" page
- Link to "Terms of use" page
- Contact information
- Website navigation links
- Links to social networks
- Link to your shop
Here is an example on how to build a footer section: How to create a Footer section