Kotlin Get Started
Kotlin IDE
The easiest way to get started with Kotlin, is to use an IDE.
An IDE (Integrated Development Environment) is used to edit and compile code.
In this chapter, we will use IntelliJ (developed by the same people that created Kotlin) which is free to download from https://www.jetbrains.com/idea/download/.
Kotlin Install
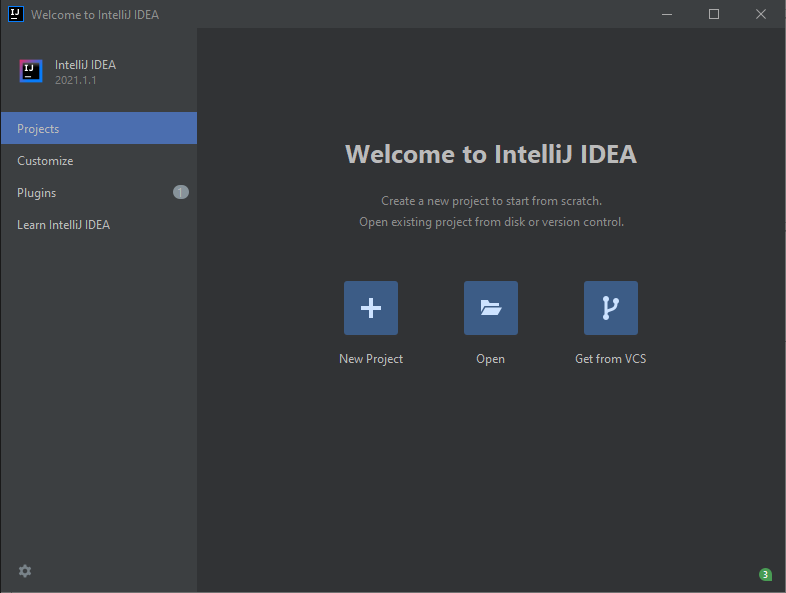
Once IntelliJ is downloaded and installed, click on the New Project button to get started with IntelliJ:
Then click on "Kotlin" in the left side menu, and enter a name for your project:
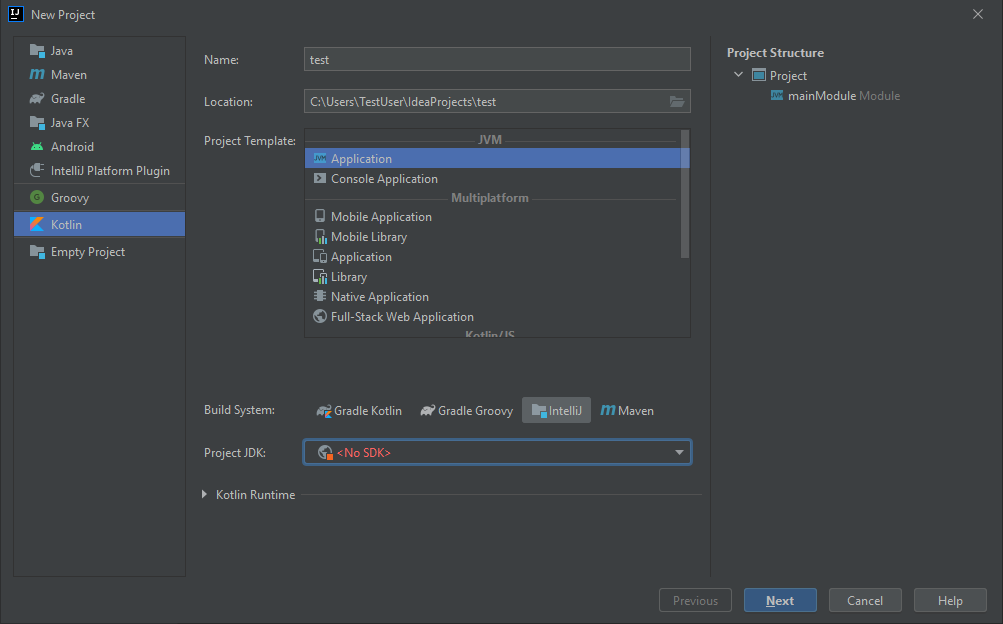
Next, we need to install something called JDK (Java Development Kit) to get our Kotlin project up and going. Click on the "Project JDK" menu, select "Download JDK" and select a version and vendor (e.g. AdoptOpenJDK 11) and click on the "Download" button:
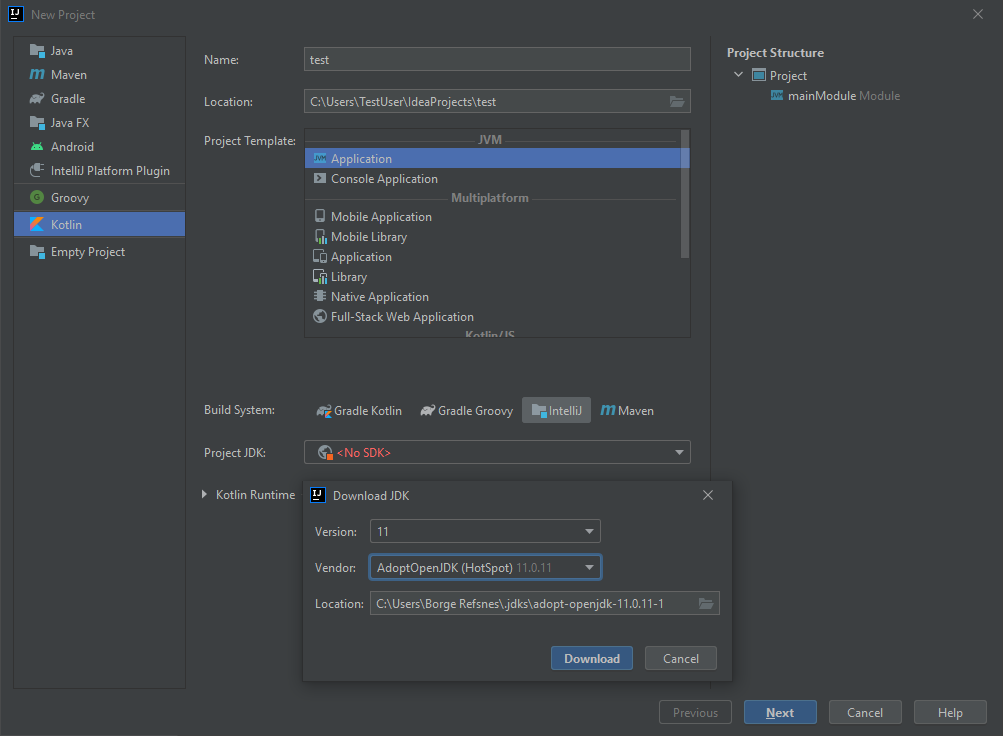
When the JDK is downloaded and installed, choose it from the select menu and then click on the "Next" button and at last "Finish":

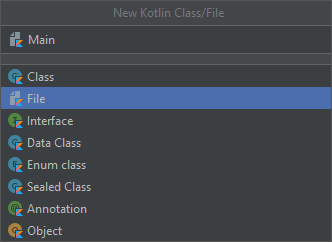
Now we can start working with our Kotlin project. Do not worry about all of the different buttons and functions in IntelliJ. For now, just open the src (source) folder, and follow the same steps as in the image below, to create a kotlin file:
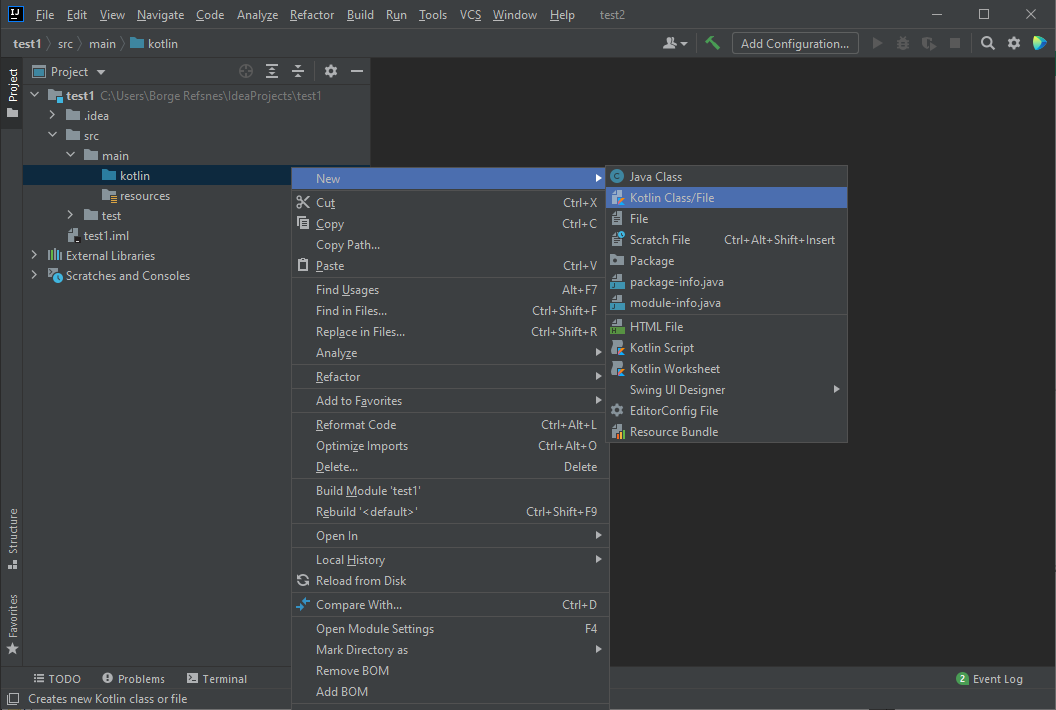
Select the "File" option and add a name to your Kotlin file, for example "Main":
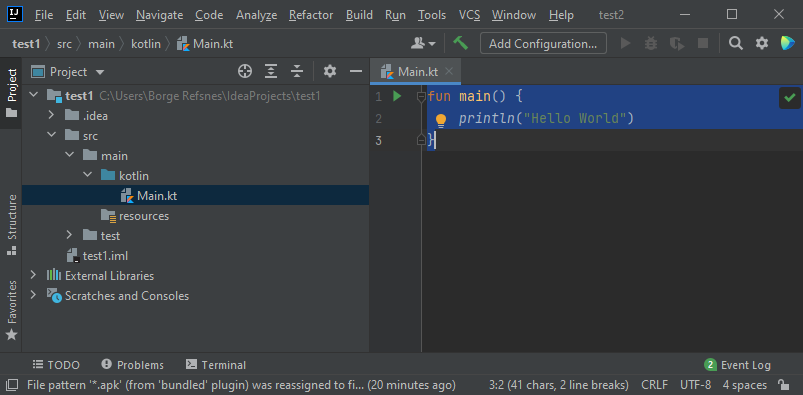
You have now created your first Kotlin file (Main.kt). Let's add some Kotlin code to it, and run the program to see how it works. Inside the Main.kt file, add the following code:
Main.kt
fun main() {
  println("Hello World")
}
Don't worry if you don't understand the code above - we will discuss it in detail in later chapters. For now, lets focus on how to run the code. Click on the Run button at the top navigation bar, then click "Run", and select "Mainkt".
Next, IntelliJ will build your project, and run the Kotlin file. The output will look something like this:
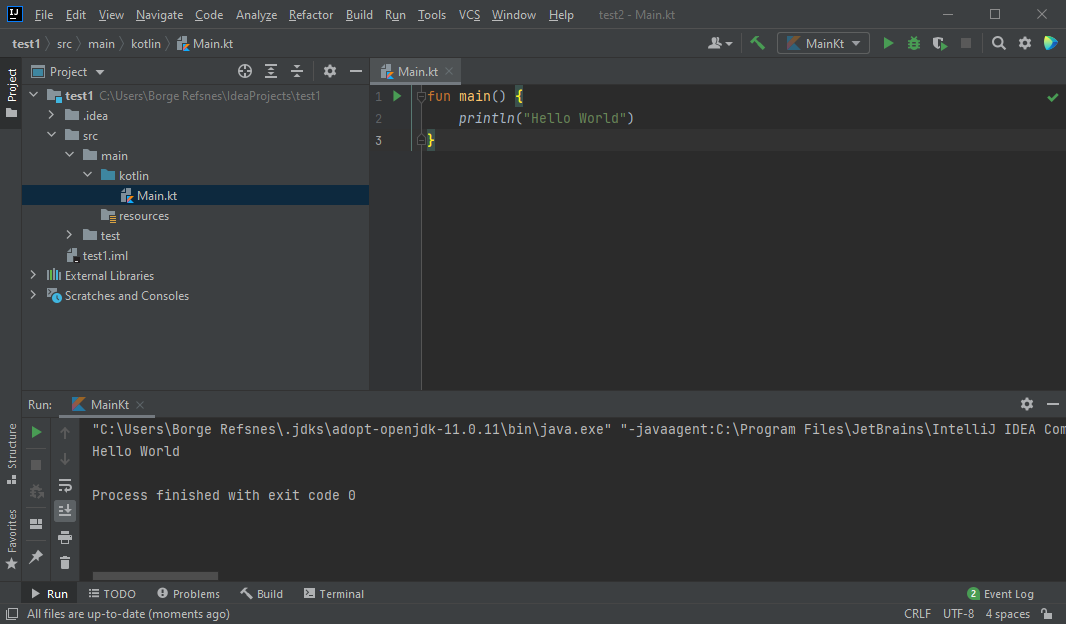
As you can see, the output of the code was "Hello World", meaning that you have now written and executed your first Kotlin program!
Learning Kotlin At W3Schools
When learning Kotlin at w3schools.com, you can use our "Try it Yourself" tool, which shows both the code and the result. This will make it easier for you to understand every part as we move forward:

