MySQL Installation on Windows
Here we will show you step by step how to install MySQL on the Windows platform using the MySQL Installer.
Download MySQL
The simplest and recommended method is to download MySQL Installer for Windows from https://dev.mysql.com/downloads/installer/ and execute it.
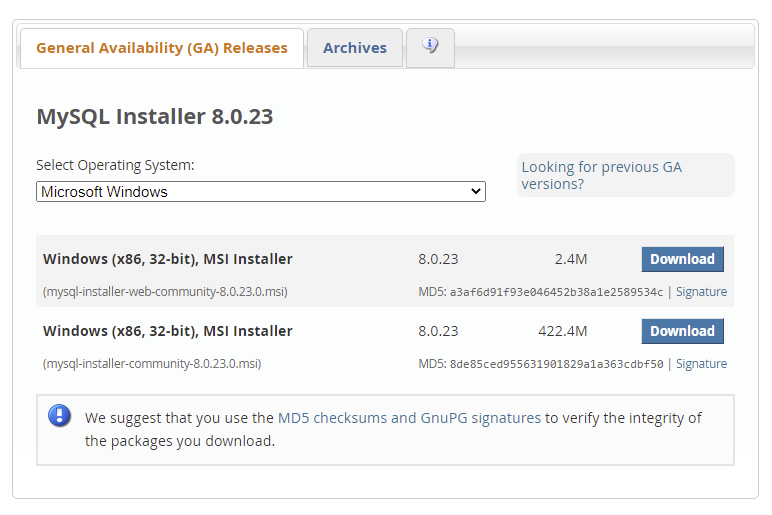
Select mysql-installer-web-community-8.0.23.msi if you have good internet
connection, otherwise choose mysql-installer-community-8.0.23.msi.
Install MySQL
After downloading, unzip it, and double click the MSI installer .exe file.
Then follow the steps below:
1. "Choosing a Setup Type" screen: Choose "Full" setup type. This installs all MySQL products and features. Then click the "Next" button to continue.
2. "Check Requirements" screen: The installer checks if your pc has the requirements needed. If there is some failing requirements, click on each item to try to resolve them by clicking on the Execute button that will install all requirements automatically. Click "Next".
3. "Installation" screen: See what products that will be installed. Click "Execute" to download and install the Products. After finishing the installation, click "Next".
4. "Product Configuration" screen: See what products that will be configured. Click the "MySQL Server 8.0.23" option to configure the MySQL Server. Click the "Next" button. Choose the "Standalone MySQL Server/Classic MySQL Replication" option and click on the "Next" button. In page "Type and Networking" set Config Type to "Development Computer" and "Connectivity" to "TCP/IP" and "Port" to "3006". Then, click the "Next" button.
5. "Authentication Method" screen: Choose "Use Strong Password Encryption for Authentication". Click "Next".
6. "Accounts and Roles" screen: Set a password for the root account. Click "Next".
7. "Windows Service" screen: Here, you configure the Windows Service to start the server. Keep the default setup, then click "Next".
8. "Apply Configuration" screen: Click the "Execute" button to apply the Server configuration. After finishing, click the "Finish" button.
9. "Product Configuration" screen: See that the Product Configuration is completed. Keep the default setting and click on the "Next" and "Finish" button to complete the MySQL package installation.
10. In the next screen, you can choose to configure the Router. Click on "Next", "Finish" and then click the "Next" button.
11. "Connect To Server" screen: Type in the root password (from step 6). Click the "Check" button to check if the connection is successful or not. Click on the "Next" button.
12. "Apply Configuration" screen: Select the options and click the "Execute" button. After finishing, click the "Finish" button.
13. "Installation Complete" screen: The installation is complete. Click the "Finish" button.
Verify MySQL Installation
Open the MySQL Command Line Client from cmd.
You should see a mysql> prompt. If you have set any password, write your password here.
Now, you are connected to the MySQL server, and you can execute all the SQL command at mysql> prompt as follows:
For example: Check the already created databases with show databases command:
