Scaling up Vue
Using *.vue files for our Vue project makes sense because:
- it becomes easier to handle larger projects with the use of templates and components.
- we can see and test our project through the https protocol, like the users will see the page.
- the page updates immediately when changes are saved, without reloading.
- this is how real web pages in Vue are built.
- it is how developers work.
Why?
As we saw on the previous page about templates and components in Vue, there is now a need for different way to work because we want to:
- have larger projects
- gather all Vue related code in one place
- use components in Vue (we will come to this soon)
- have highlighting and auto-completion support in the editor
- auto-update the browser
And to make all this possible we must switch to *.vue files.
How?
SFCs (Single File Components), or *.vue files, are easier to work with but cannot run directly in the browser, so we need to set up our computer to compile our *.vue files to *.html, *.css and *.js files so that the browser can run our Vue application.
To build our web page based on SFCs we use a program called Vite as the build tool, and we write our code in the VS Code editor with the Volar extension for Vue 3 language features.
Setup
Follow the three steps below to install what you need to run Vue SFC applications on your computer.
-
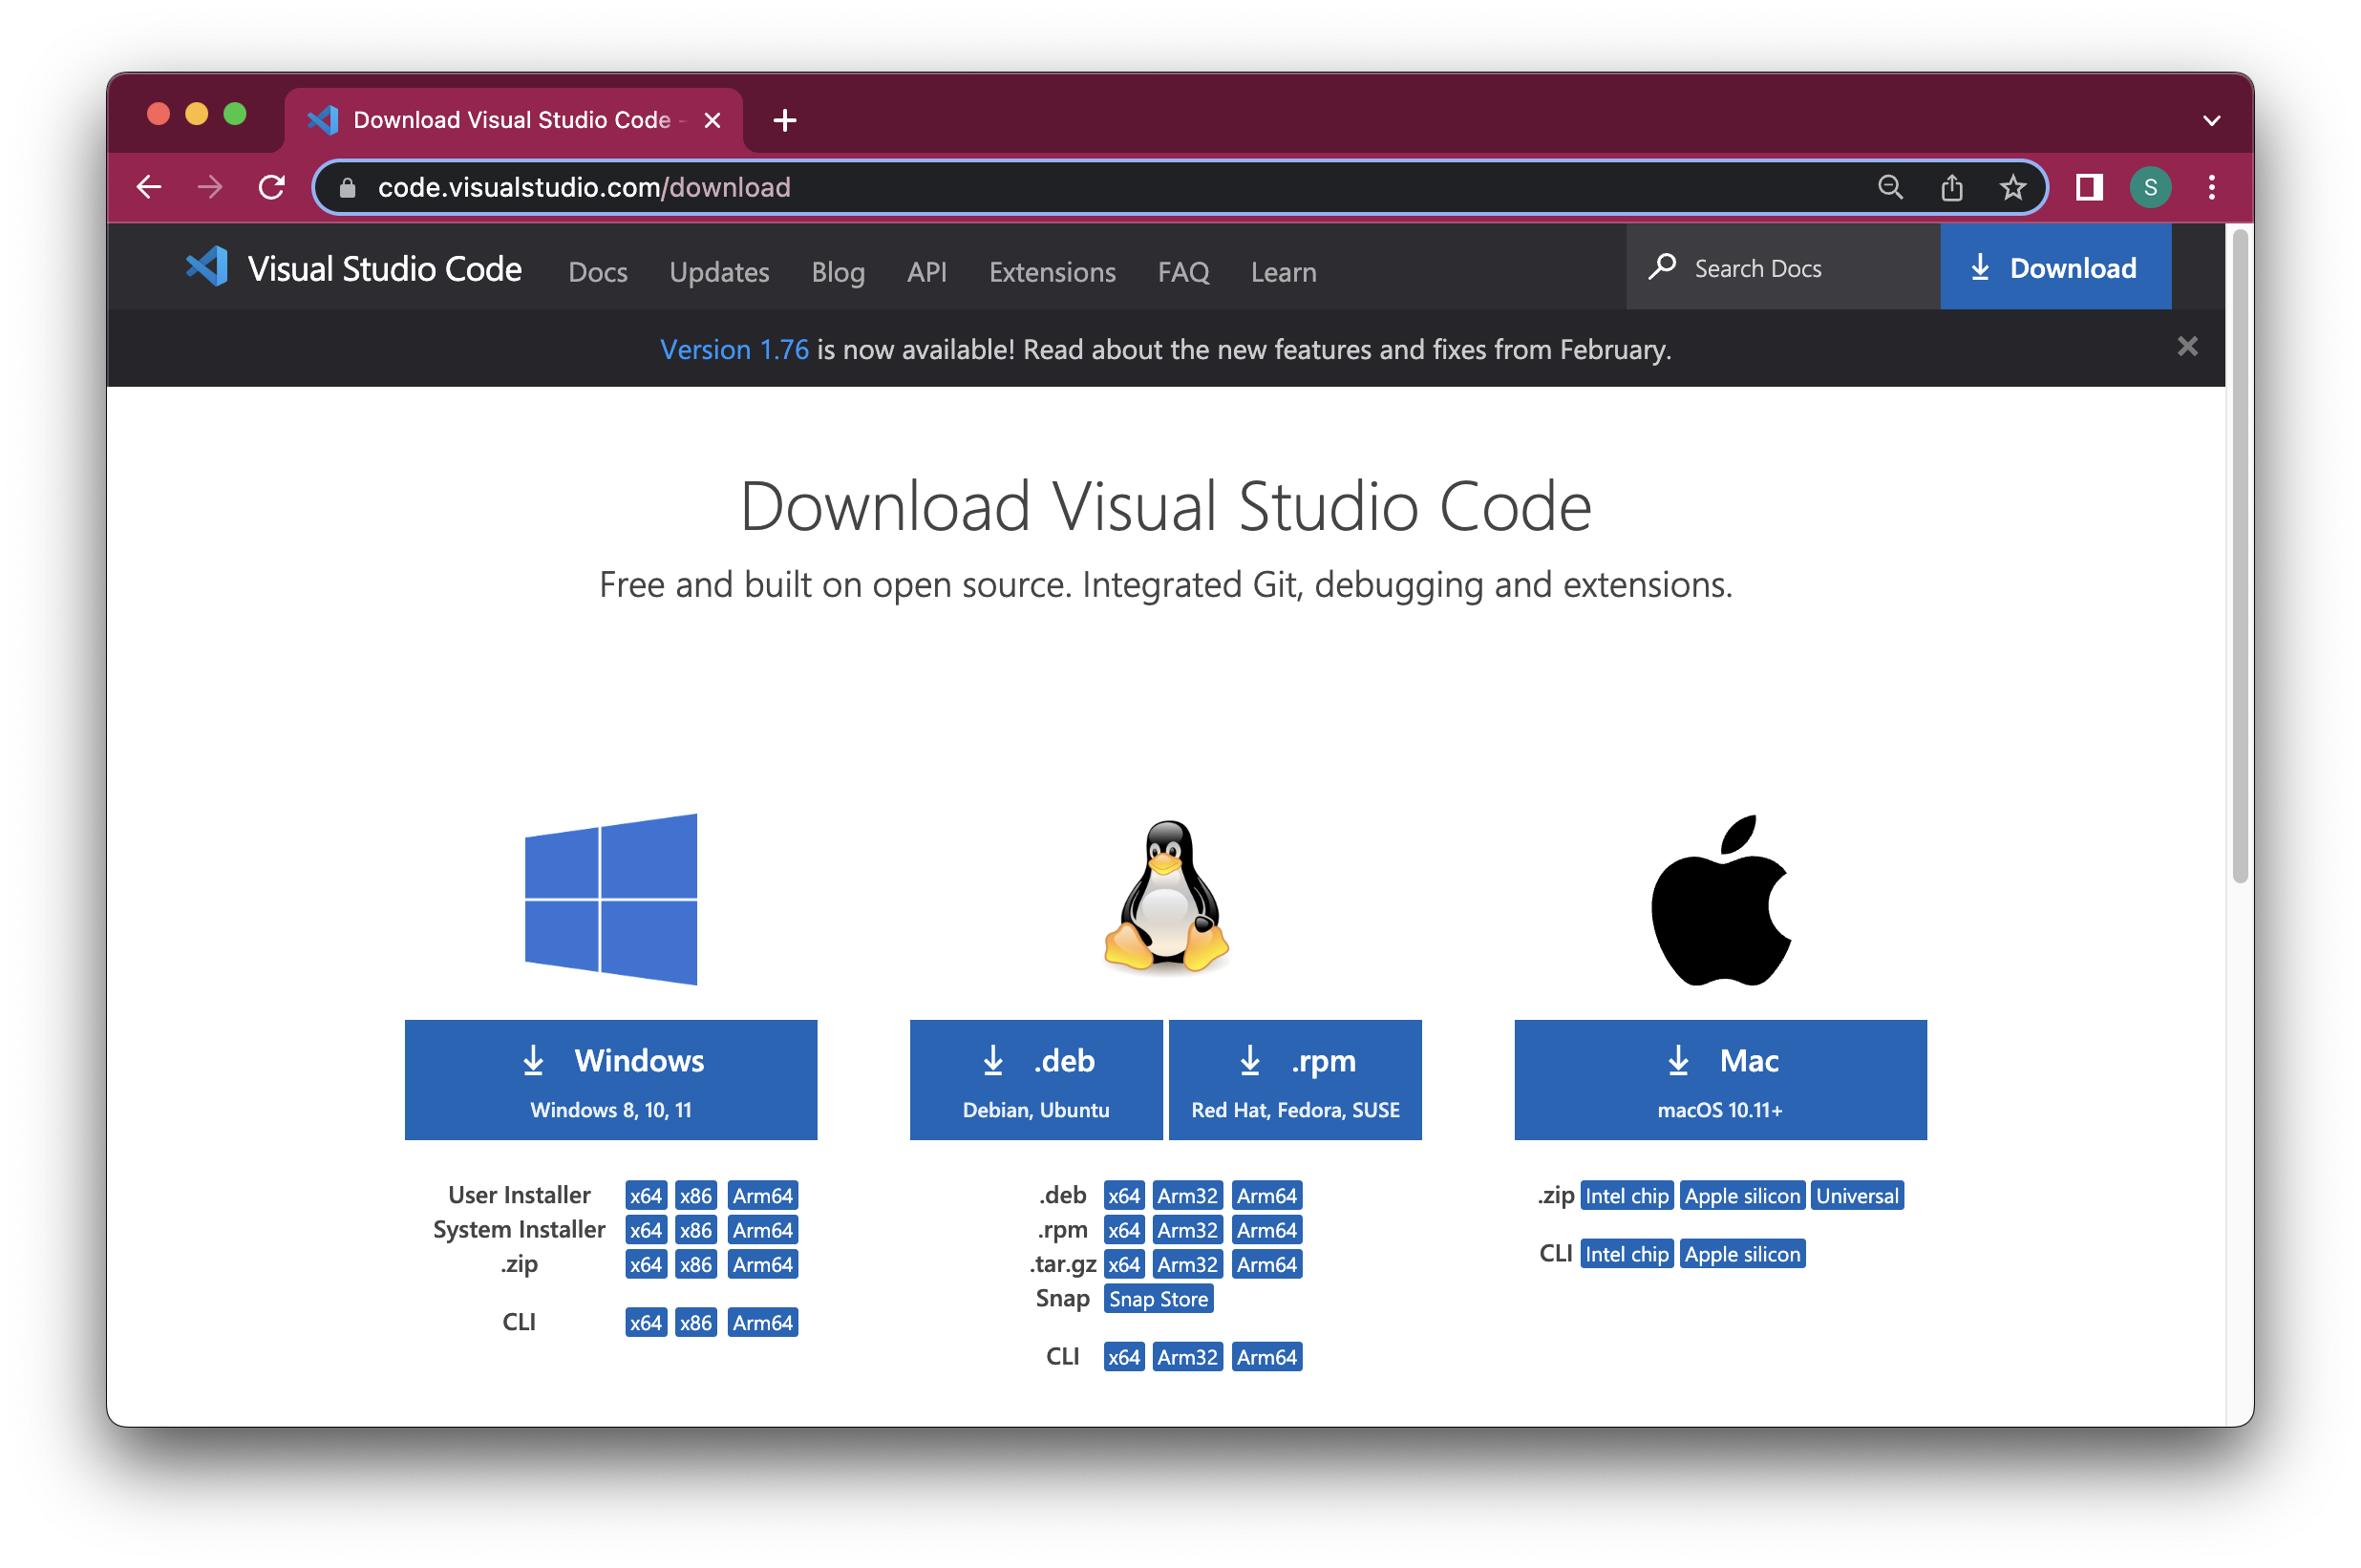
The "VS Code" Editor
There are many different editors that can be used for Vue projects. We use the VS Code editor. Download VS Code and install it.
-
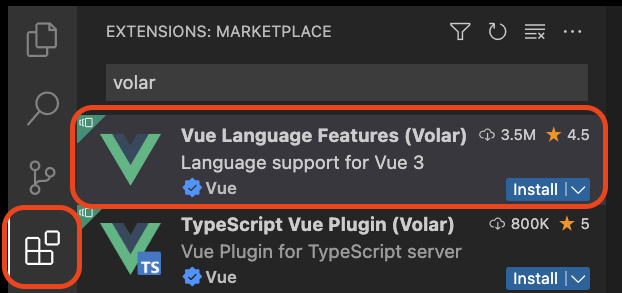
The VS Code "Volar" Extension
To get highlighting and auto-completion with *.vue files in the editor, open VS Code, go to "Extensions" on the left hand side. Search for "Volar" and install the extension with the most downloads and the description "Language support for Vue 3".
-
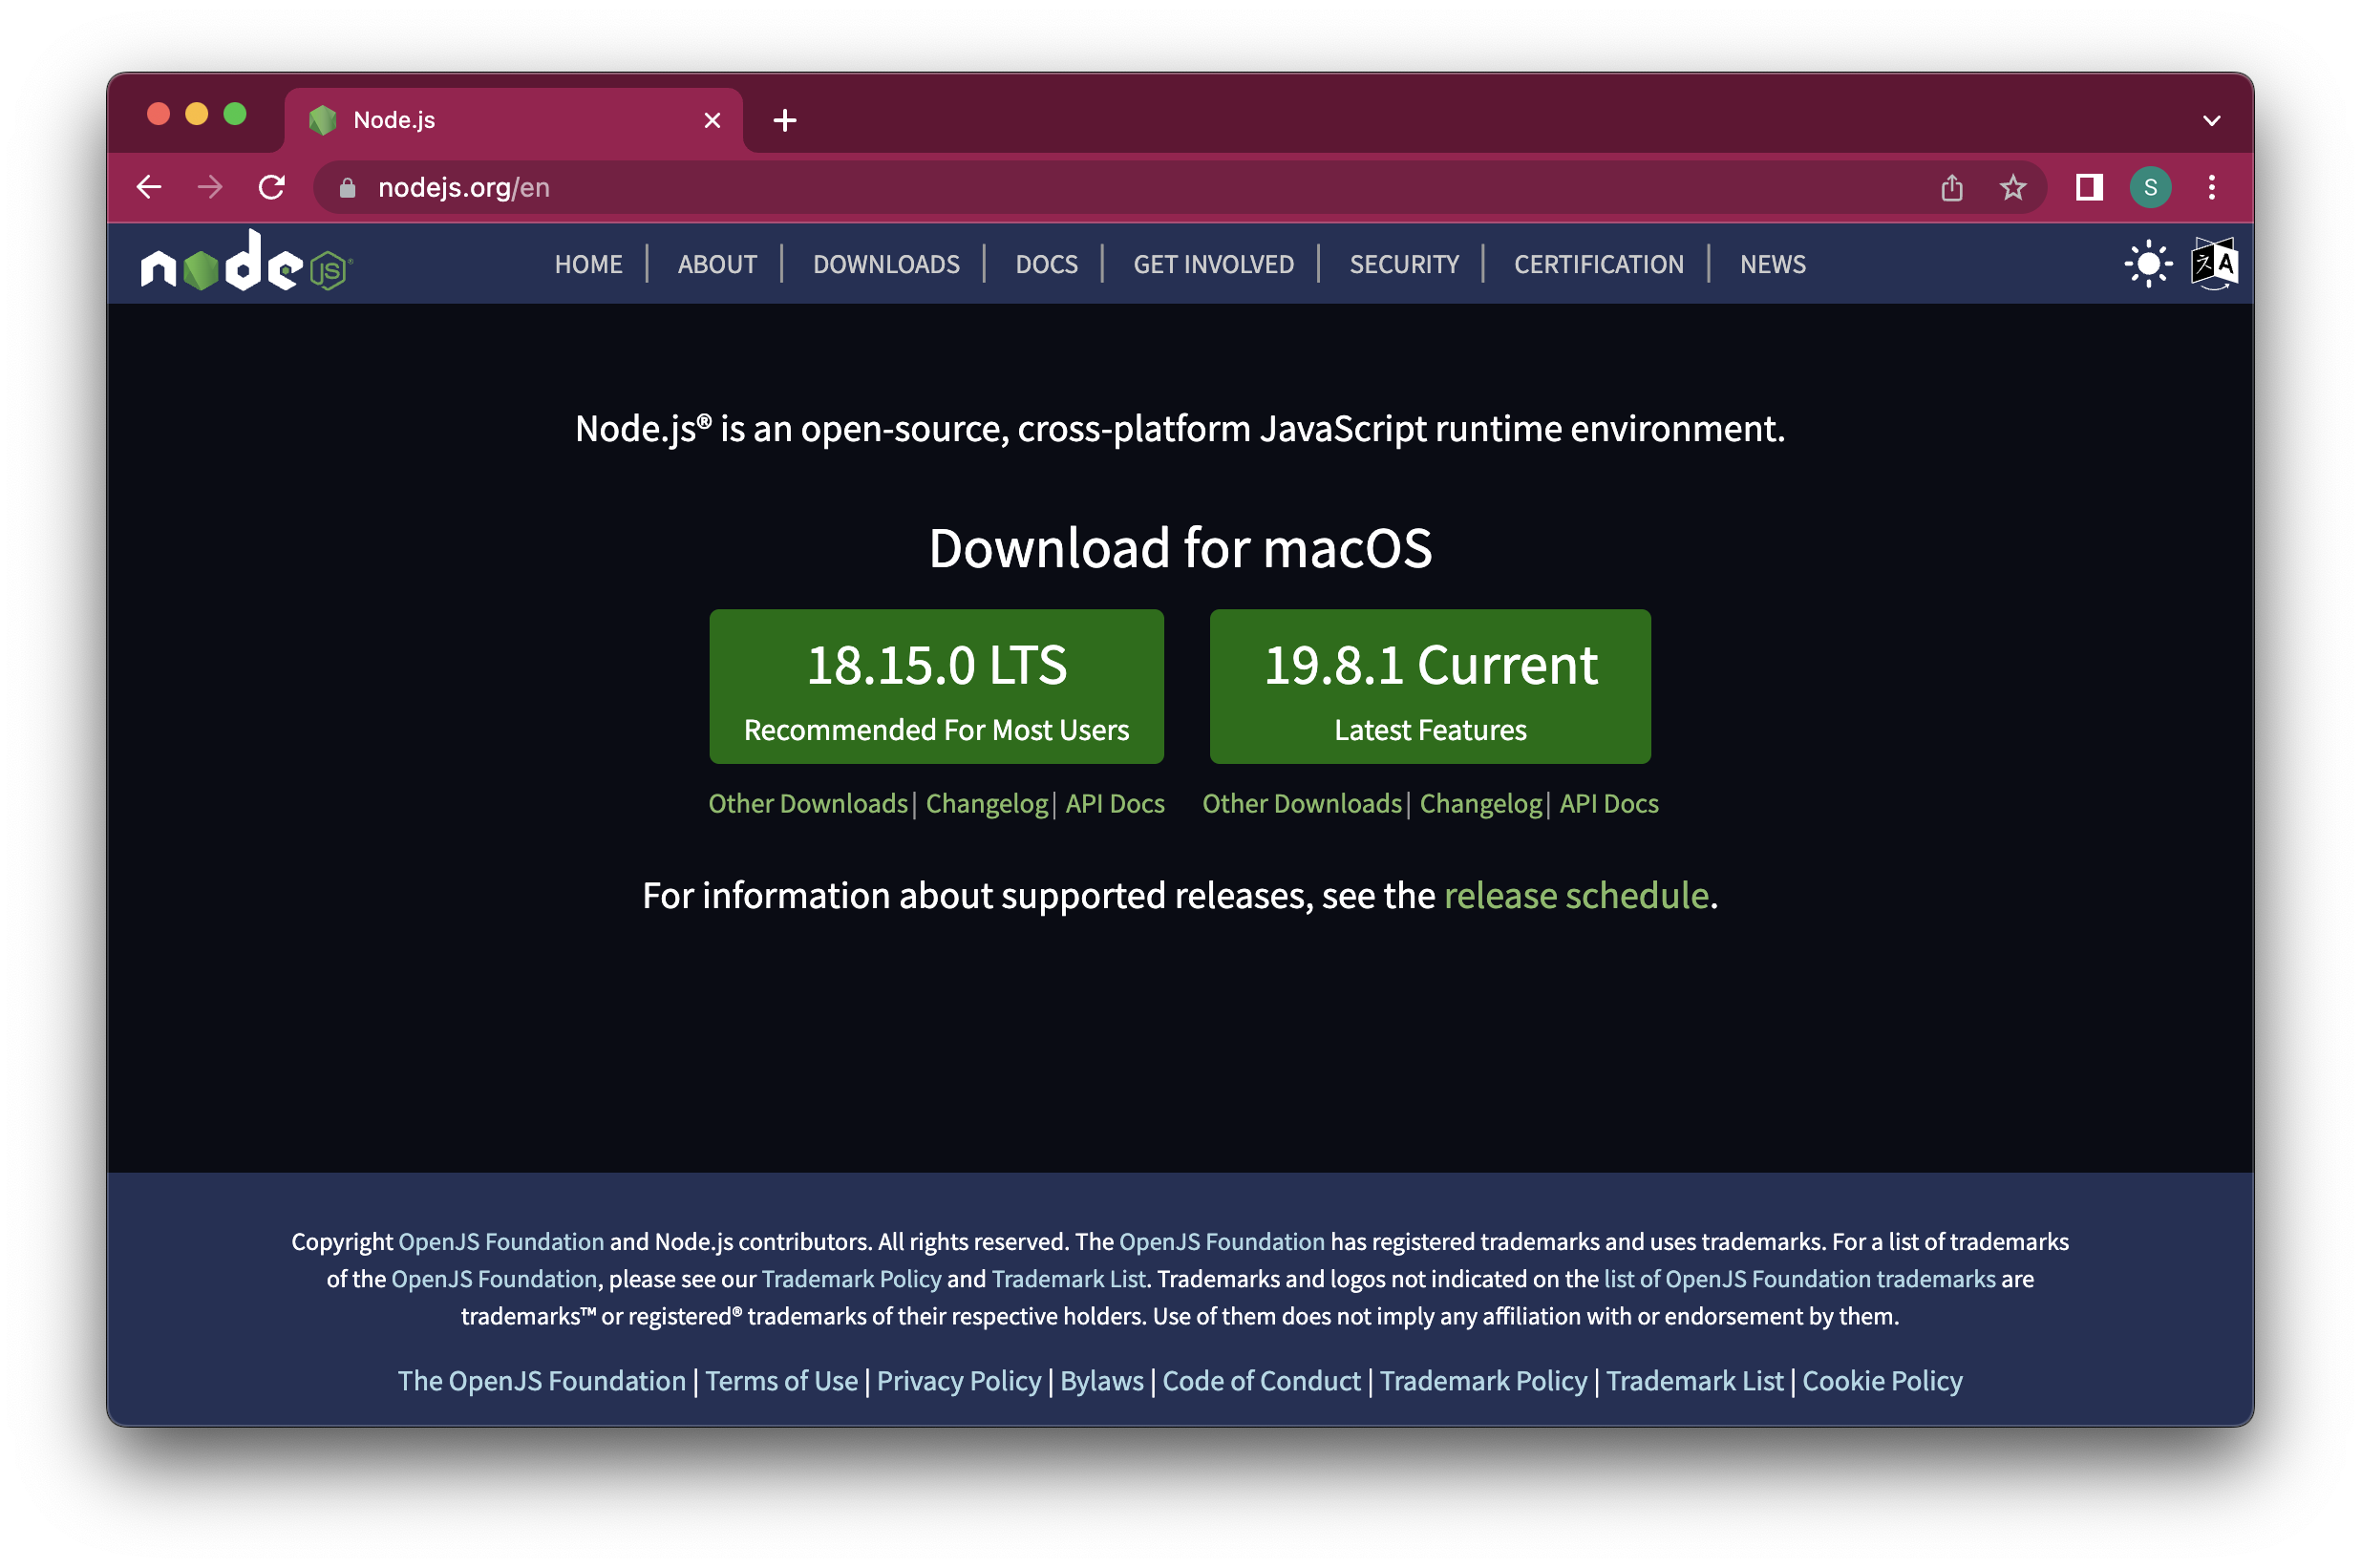
Node.js
Download and install the latest version of Node.js, as the Vue build tool "Vite" runs on top of this.
Node.js is an open-source server-side JavaScript runtime environment.
Create The Default Example Project
Follow the steps below to create the default Vue example project on your computer.
-
Create a folder for your Vue projects on your computer.
-
In VS Code, open a terminal by choosing Terminal -> New Terminal from the menu:

-
Use the terminal to navigate to the Vue folder you just created by using commands like
cd <folder-name>,cd ..,ls(Mac/Linux) anddir(Windows). If you are not familiar with writing commands in the terminal, see our introduction to Command Line Interface (CLI) here.
-
After you have navigated to your Vue folder in the terminal, write:
npm init vue@latest
-
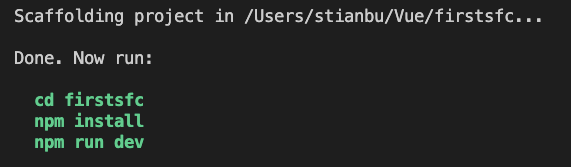
Create your first project, with project name "firstsfc":

-
Answer "No" to all options:
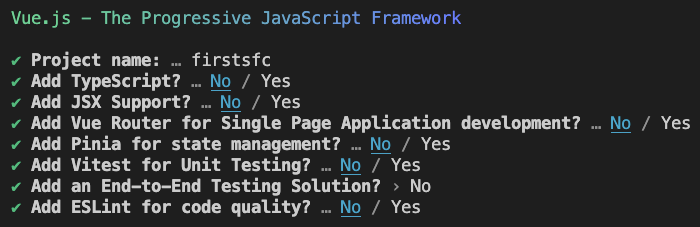
-
Now you should be presented with this in your terminal:
-
We will now run the commands as suggested above.
Run this command to change directory to your new project inside the 'firstsfc' folder:
cd firstsfc
-
Install all required dependencies so that the Vue project works:
npm install
-
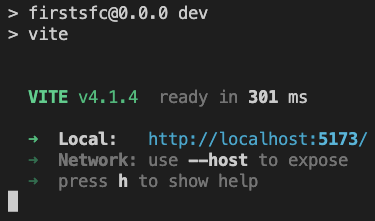
Start the development server:
npm run dev
-
The terminal window should now look like this:
And your browser should open the example project automatically:
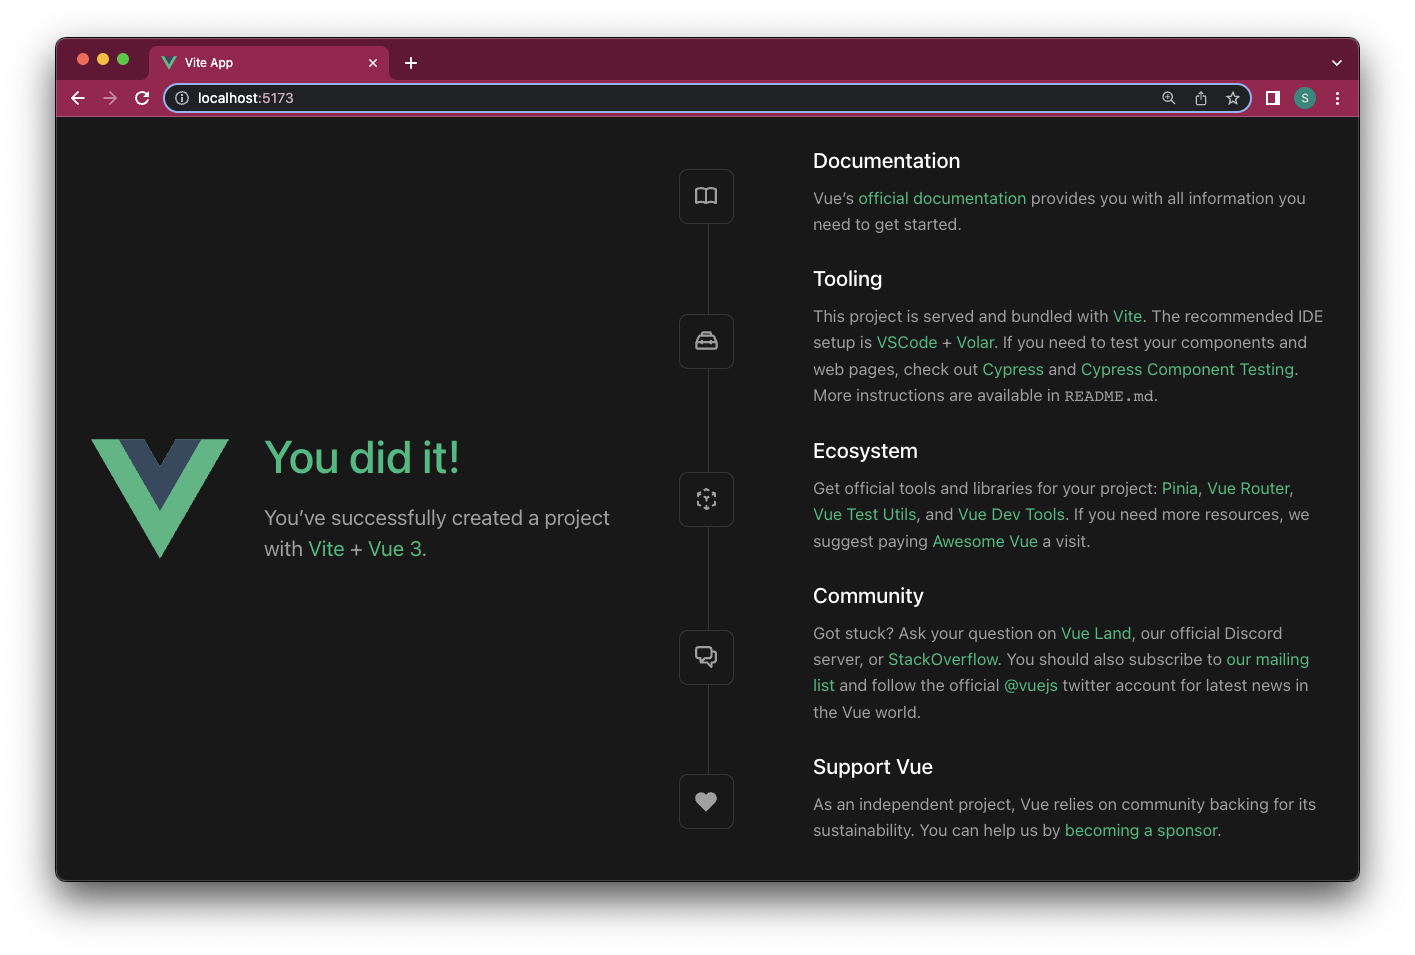
If you cannot find the example project in the browser, use the link from the terminal. The link you find in your terminal window might have a different address than the address in the screenshot above.
Now the example project is running on your machine in development mode by the Vite build tool.
The Project Files
The example project that has automatically been created contains many files, and we will take a quick look at a few of them.
main.js
Go to your Vue project in the VS Code editor, find the "main.js" file in the "src" folder:
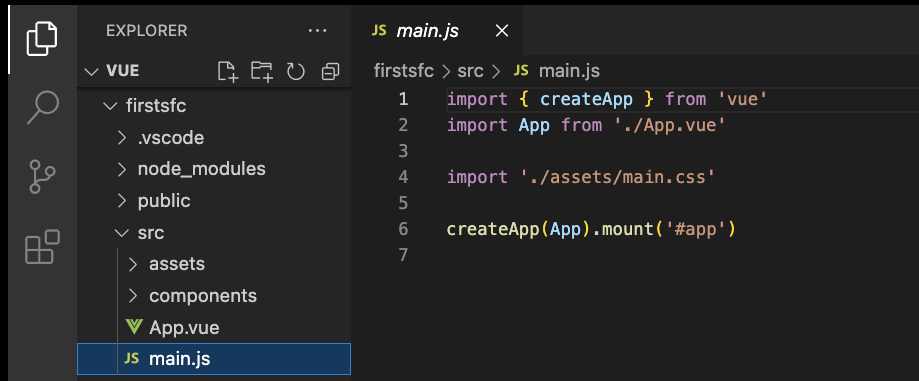
"main.js" tells Vite how to build the Vue project based on the "App.vue" file. This is similar to how we previously gave a CDN link with the script tag to tell the browser how to run our Vue code, and how we mounted the Vue instance to the <div id="app"> tag.
App.vue
In the same example project folder, find the "App.vue" file and open it. Like all other *.vue files, "App.vue" contains three parts: a <script> part, a <template> part and a <style> part.
App.vue:
<script setup>
import HelloWorld from './components/HelloWorld.vue'
import TheWelcome from './components/TheWelcome.vue'
</script>

<template>
  <header>
    <img alt="Vue logo" class="logo" src="./assets/logo.svg" width="125" height="125" />

    <div class="wrapper">
      <HelloWorld msg="You did it!" />
    </div>
  </header>

  <main>
    <TheWelcome />
  </main>
</template>

<style scoped>
header {
  line-height: 1.5;
}

.logo {
  display: block;
  margin: 0 auto 2rem;
}

@media (min-width: 1024px) {
  header {
    display: flex;
    place-items: center;
    padding-right: calc(var(--section-gap) / 2);
  }

  .logo {
    margin: 0 2rem 0 0;
  }

  header .wrapper {
    display: flex;
    place-items: flex-start;
    flex-wrap: wrap;
  }
}
</style>
As you can see in the script part of "App.vue", other *.vue files are referred to: those are 'components' and are located in the 'components' folder. If you take a look in the 'template' part of the 'App.vue' file, you can see tags that are not normal HTML tags: <HelloWorld> and <TheWelcome>. This is how the components are referred to. Components are like apps within the app. We will learn more about components soon.
